Adding A Trigger
Triggers can be used to watch the new information or change in a dedicated area of the app
Appy Pie connect helps in parsing the data individually in particular fields through your APU whenever new changes in data are found. Connect trigger is operational after the gap of a few minutes and check the information modified in API endpoints. This information can be filtered for particular fields and actions can be performed in other apps as per the user desire.
Triggers can be added to the Appy Pie Connect, the user needs to fill the information in the form to complete this step. The input form will ask the details from the user to receive the data from particular fields. The Appy Pie Connect trigger will automatically look for the new data flow after every few minutes in your app. GET, HTTP verb or REST hook can be used for receiving the data from your API.
Now to add the trigger follow the steps given below
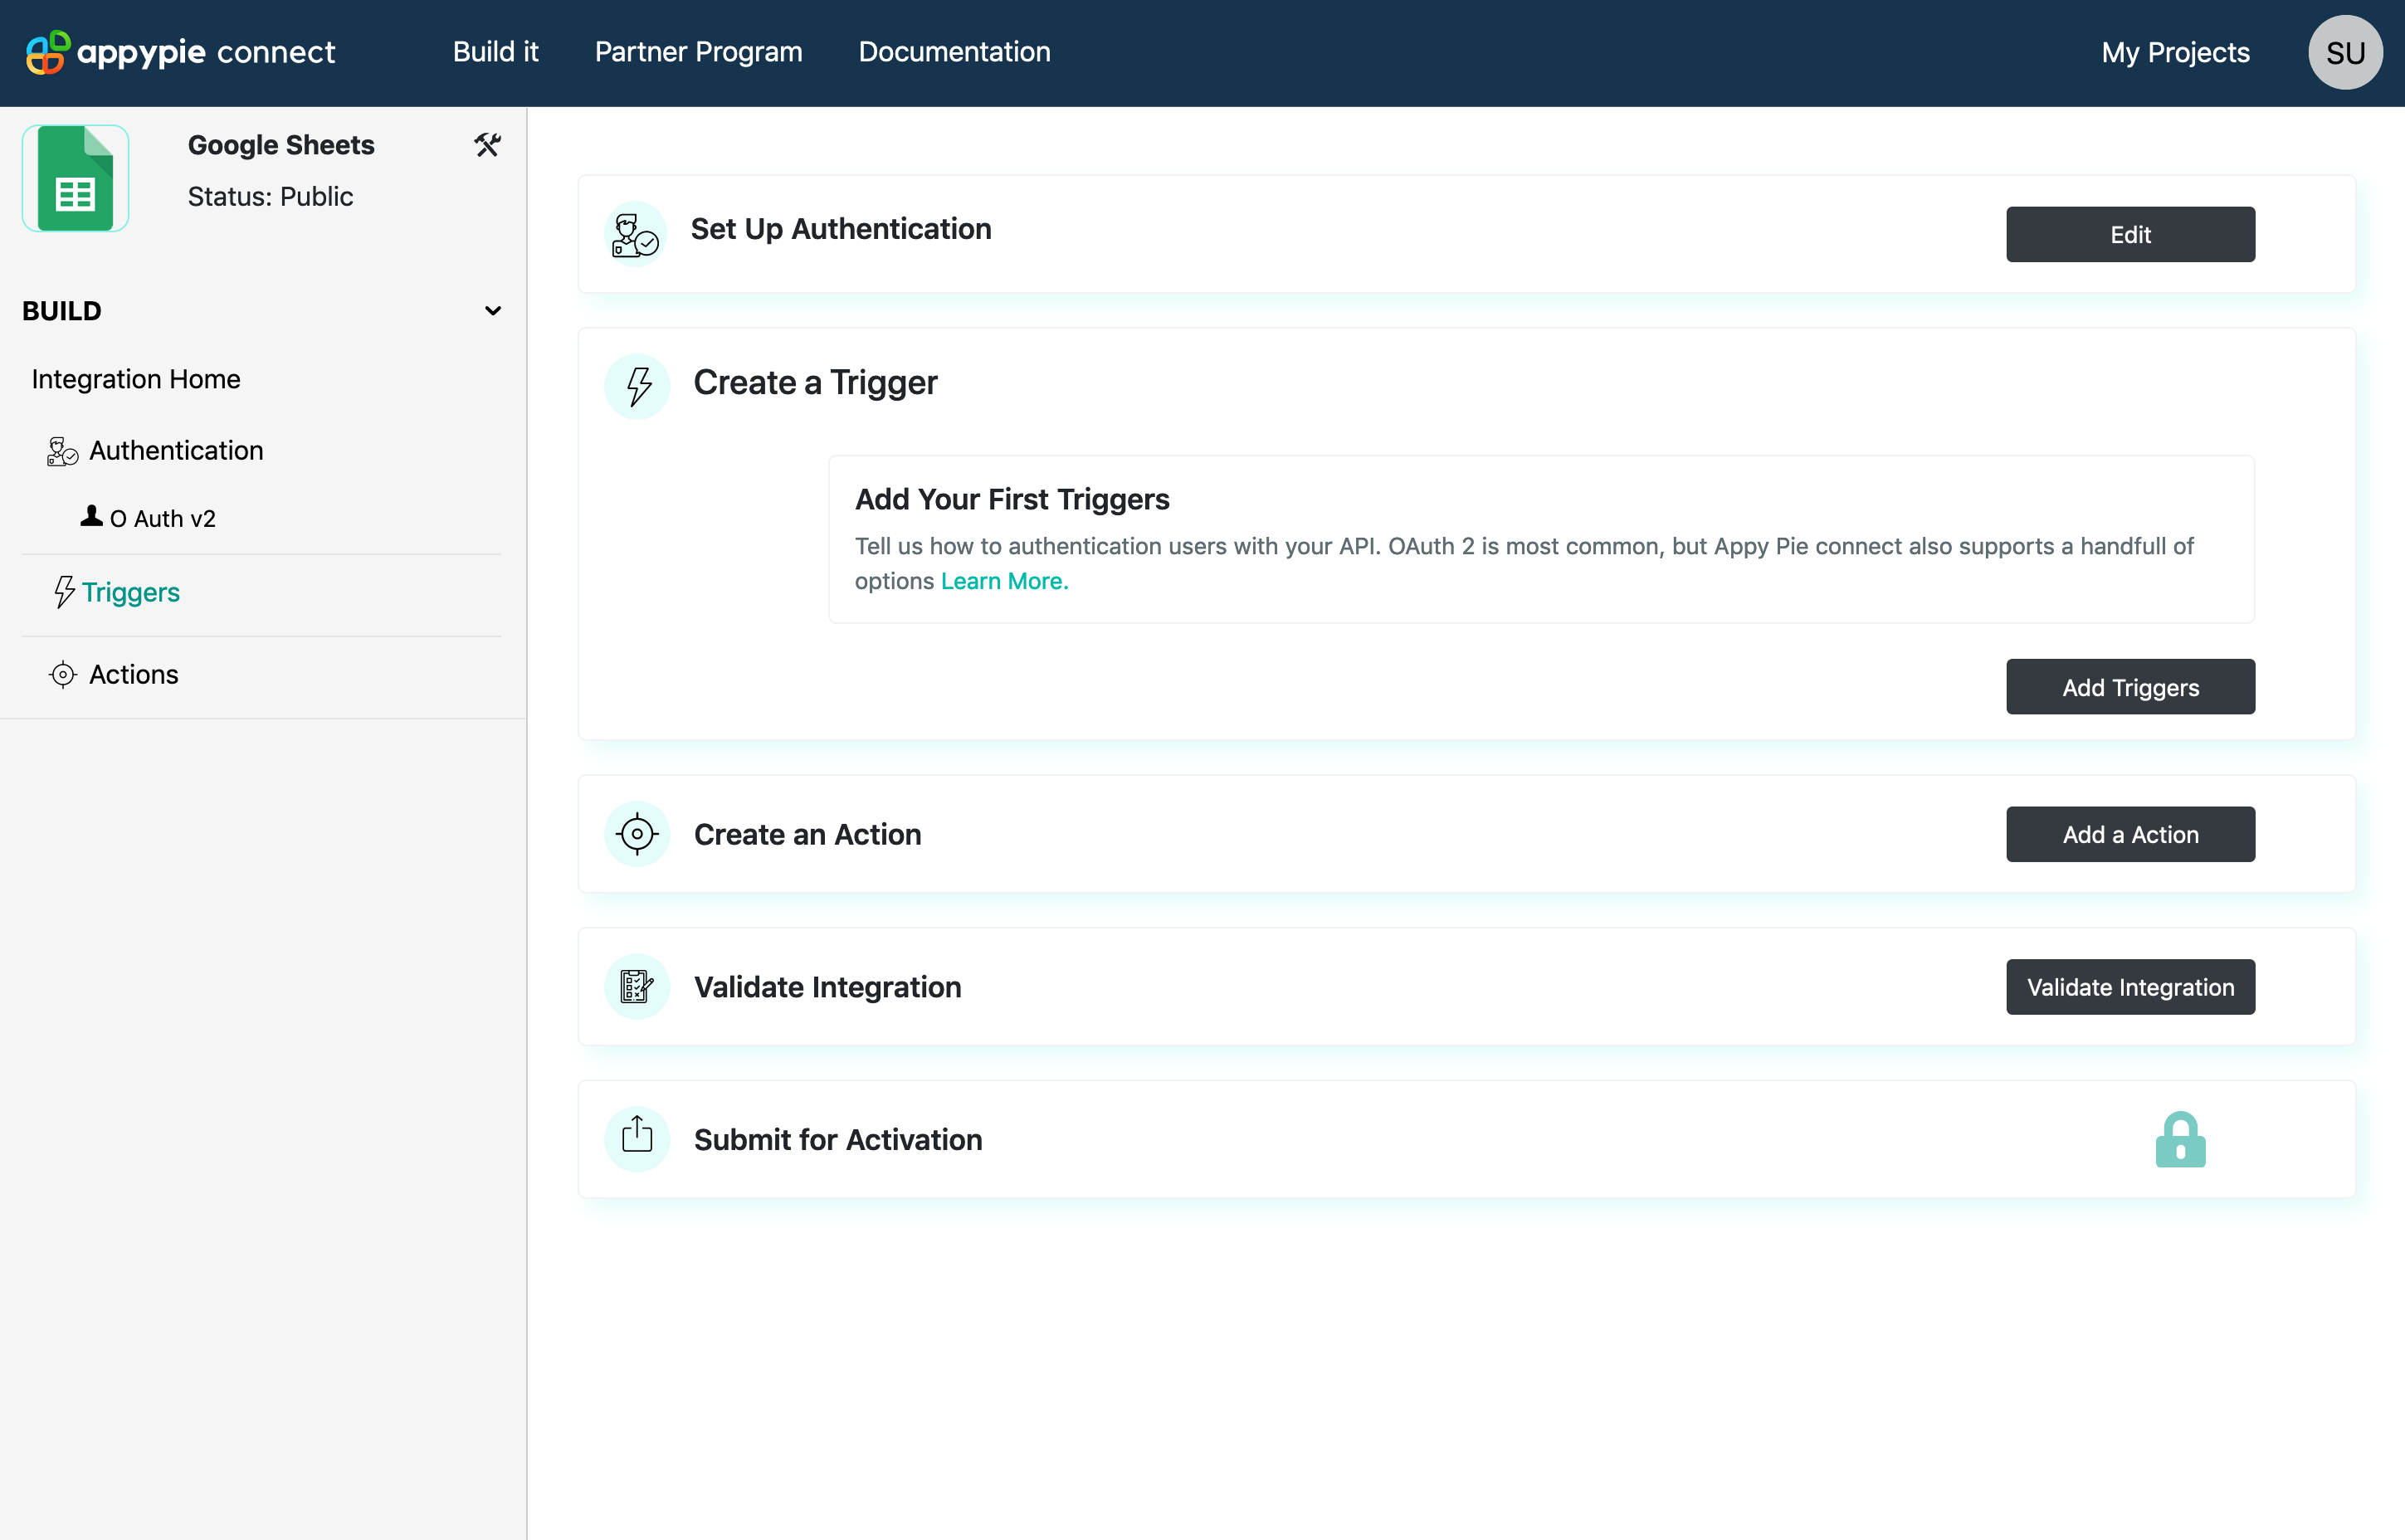
I. Configure Trigger Settings

After clicking Add Trigger, you will reach the Settings page of the Trigger. Each trigger will have a:
- Name – of the trigger to be seen by the users of Appy Pie Connect
- Description – to describe the purpose of a trigger to users
Click Save once information is filled, you’ll be redirected to the Input Designer page.
II. Design Trigger Input Field Form

This Input Designer, just like its name suggests, will let your app users customize or design the trigger inputs to watch for the specific data in the Appy Editor form.
So to begin, you need to Add User Input Field in the Input Designer tab, where you can add the fields you want to watch for any updates in respective teams.
- Key – A specific name that can help in remembering the trigger
- Label – A name for the information to be collected, make sure that it easy to read for the end-user
- Type- Select according to the preference between “String” & “Select”. If “Select” is chosen then the “Static” or “Dynamic” value should be entered.
These input form fields will also allow you to gather data from the users for your trigger. You need to enter API Endpoint and Label as mandatory fields. Other optional fields are Help Text and Place holder.
To make this integration simpler, select String in the Type field (which is also set as default type), so that the user can type the field name into Appy Pie Connect instead and then select Dropdown in the Options menu with Static or Dynamic options.
Select the “Create” option once all the fields are in order.
You can see how the form looks by clicking Appy Editor Preview.
III. API Configuration
Step 1: Configure Your API Request

Adding the URL to request data from your app will help in completing the configuration process at Appy Pie Connect automatically.
Select among different options of GET, PUT, POST, PATCH, DELETE & HEAD. Enter the Google Developer Console issued API endpoint in the field:
https://www.googleapis.com/drive/v3/files
Note: To get this link you need to go back to Google Developer Console and activate another API which will be Google Drive. Check above to learn how to add the Google Drive
You can change the advance setting under the “Show Options” tab. Go to “HTTP Header” and enter Key value as “Authorization” with Value of
Bearer{{accessToken.response.access_token}}
With the help of GET call the Connect will automatically pass through every field including authentication.
Step 2: Test your API Request
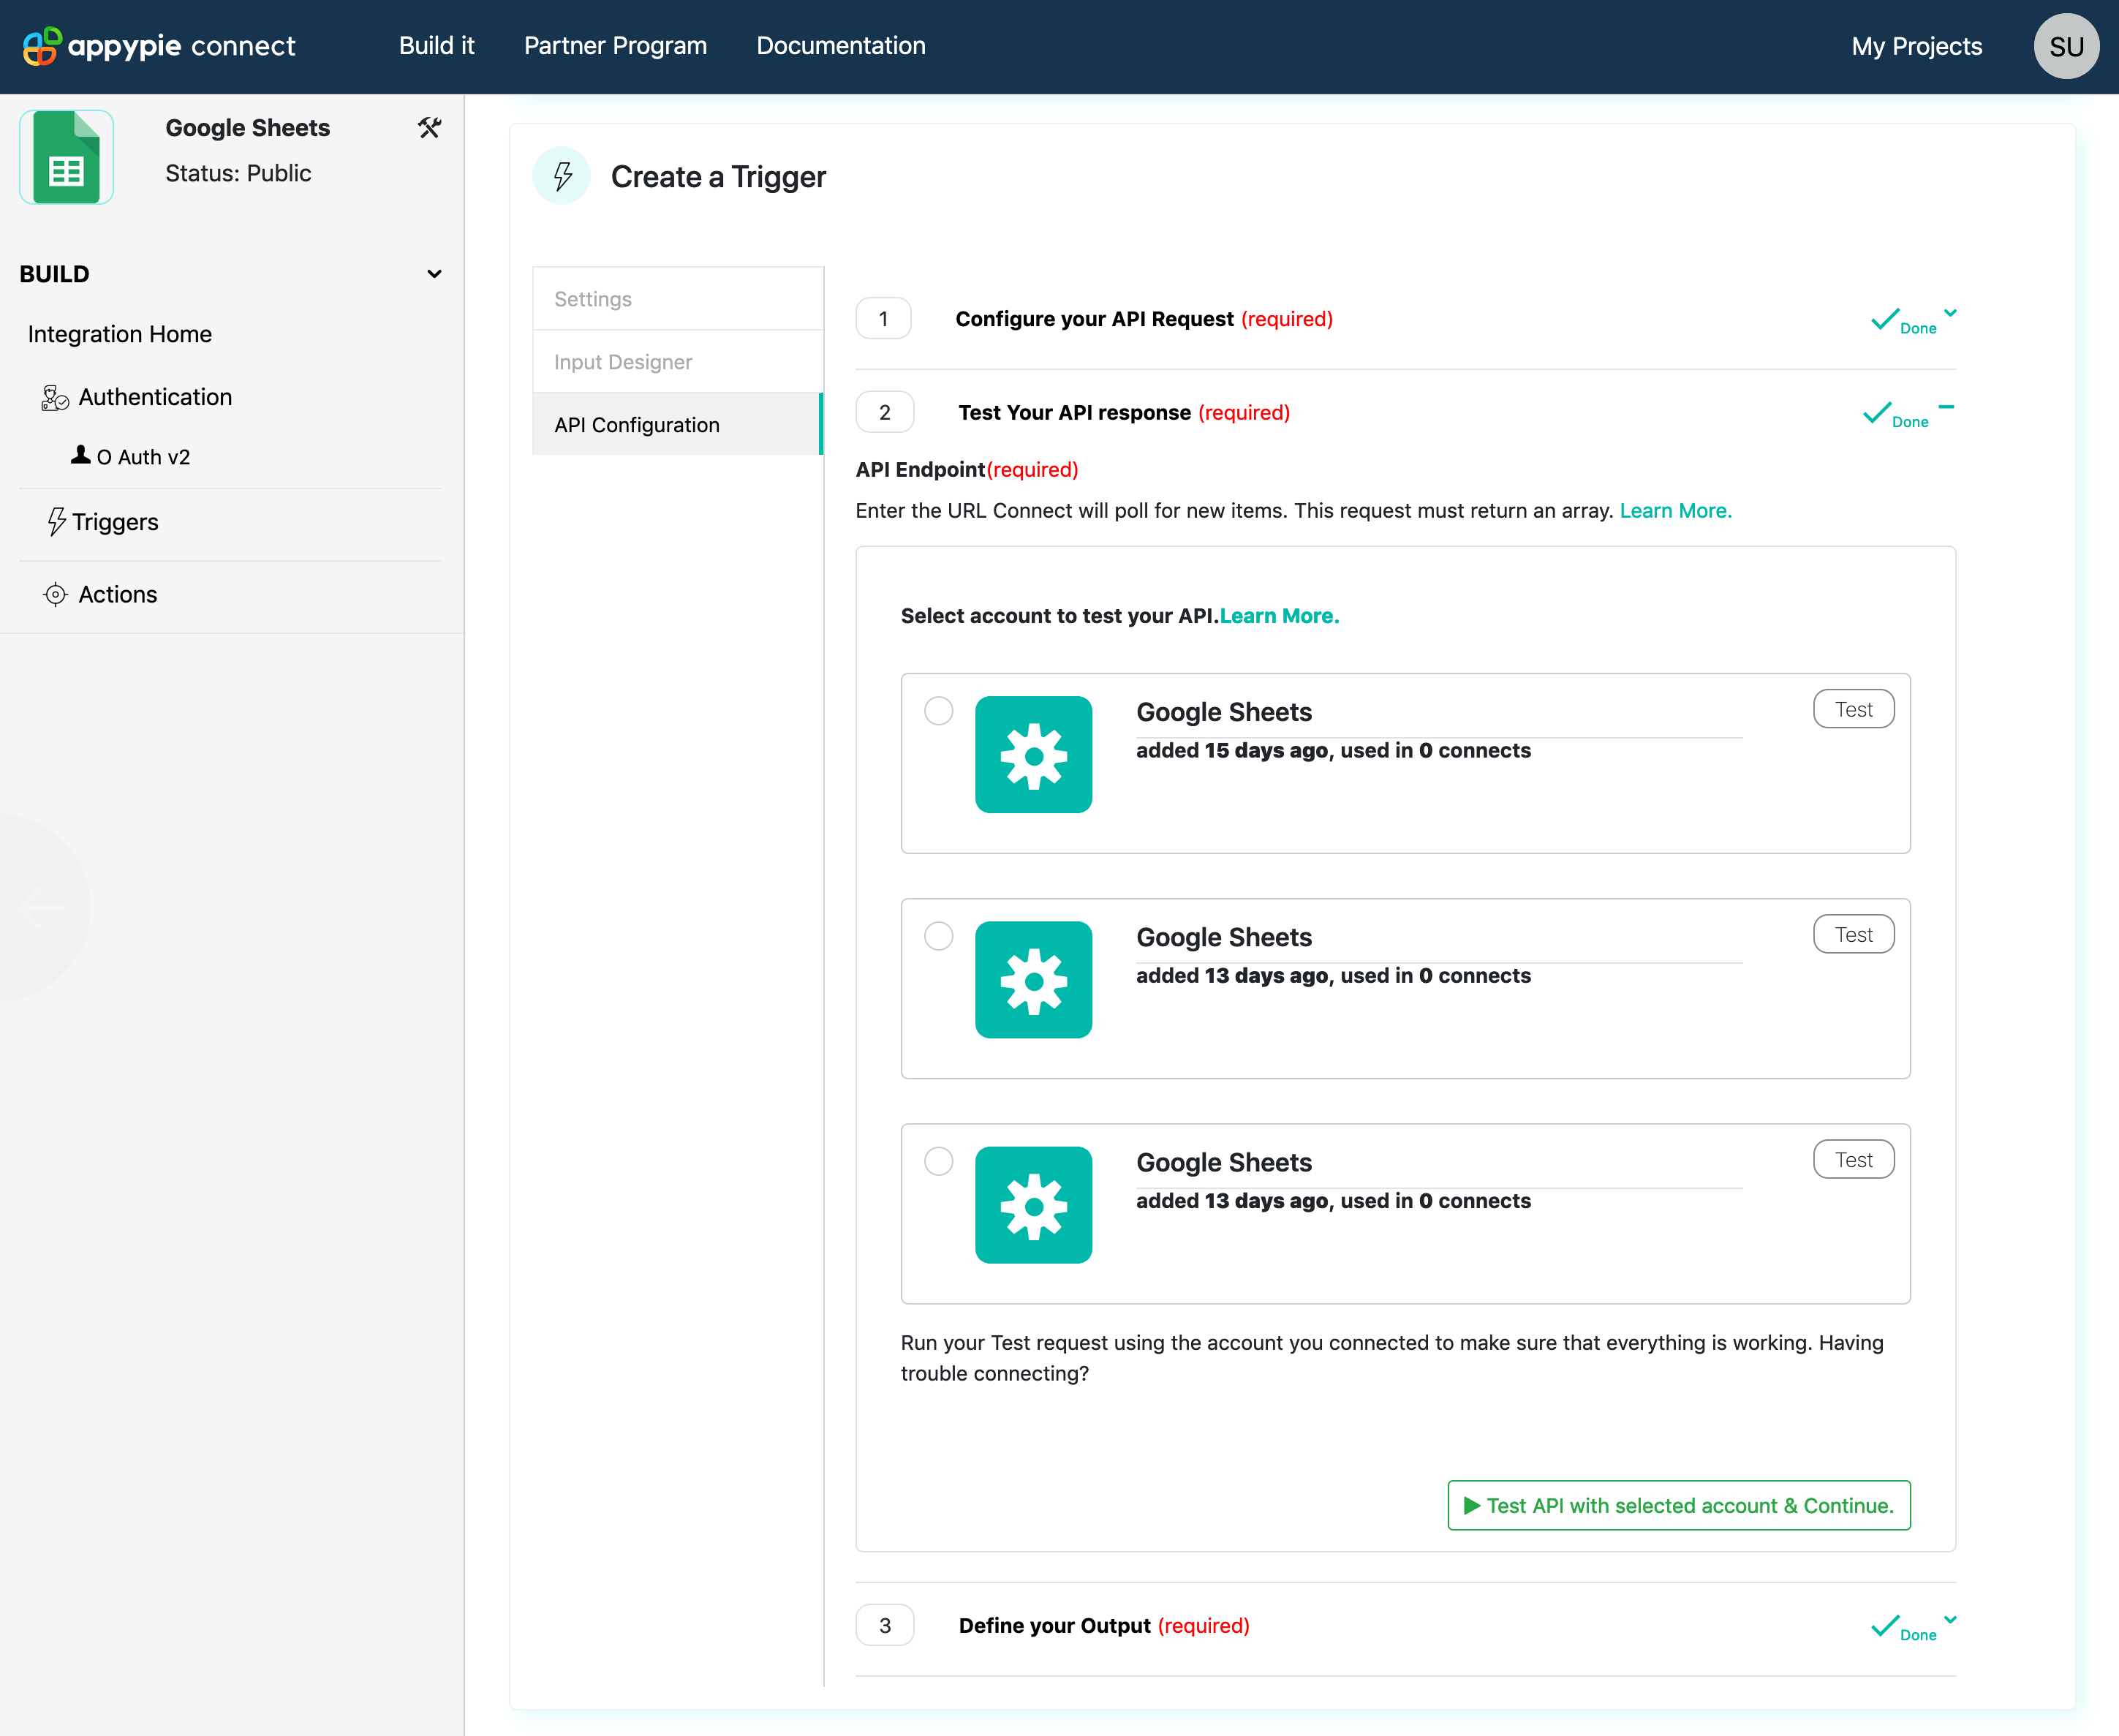
This step ensures that your trigger is working in the manner expected.
To test your Trigger, select the account & click the “Test API with selected account & Continue”
Appy pie connect will check the Google Developers Console account you added and will authenticate accordingly, you need to enter its credentials to complete the test process. Once the test starts it will check for all the output data and will reflect in raw JSON output along with data available in Google sheet.
Step 3: Define Your Output

It is important to define output fields for the end-user to understand which data needs to be accessed from your app on Appy Pie Connect. Based on the API’s, a table with all the output fields will be available. You can select the fields to be shown and can change their order along with adding new. JSON will give the raw output of all the data fetched, you can delete the undesired results. After completing this hit “Save Output Field”.