Appy Pie Connect Input Designer
To make the integration work at Appy Pie Connect there are two important factors. Out of this one is to tell Appy Pie Connect how to connect to your API and second is to create forms and let the users input data to interact with your API.
Input designer is basically used in further steps to build an integration at Appy Pie Connect. It asks to enter details in a form for your app and create new forms to accept the data on which your app will work for its users. This will allow the user to handle the data as per their requirement.
Input forms can be added to both the triggers and actions, but, actions mostly need input forms as they help the users to send data in your app and update or create new items accordingly.
How to Use Appy Pie Connect Input Designer
It is simple when it comes to working on the Input Designer Form, just as Google Form. But, the only difference is that you will be building one which works exclusively with your integration at Appy Pie Connect. Make it as informative as possible, add all the fields from which information or data required for your app’s integration could be collected. For short text fields string is used as the default type by the Appy Pie Connect. Now, to configure your input data type according to your apps requirement, you can choose from the different options available. Be careful to design the fields in the form according to the specific order required by your app. If you want to reorder the form, you can use arrows given in the input form designer for arranging the order of the fields in Appy Pie Connect.
Add Fields
Appy Pie Connect uses two types of fields:
- Input Fields are the type of fields that are used most commonly in the integration of Appy Pie Connect. There are two important field types with which the String (Simple text type) & Select (which is further divided into two parts static or dynamic) type data can be mapped in the form.
- Static Fields hold the dropdown menu with pre-filled information for the user to select. For example Country names, Country Codes, etc.
- Dynamic Fields the returned information in the dropdown menu for the API calls made. The user gets the option to select the desired result which is mostly used to match with the information such as project, files, etc from the app.
Appy Pie Connect integrations are moreover based on the input fields, dynamic data fields help the users when data from your app has to be fetched & selected in the form.

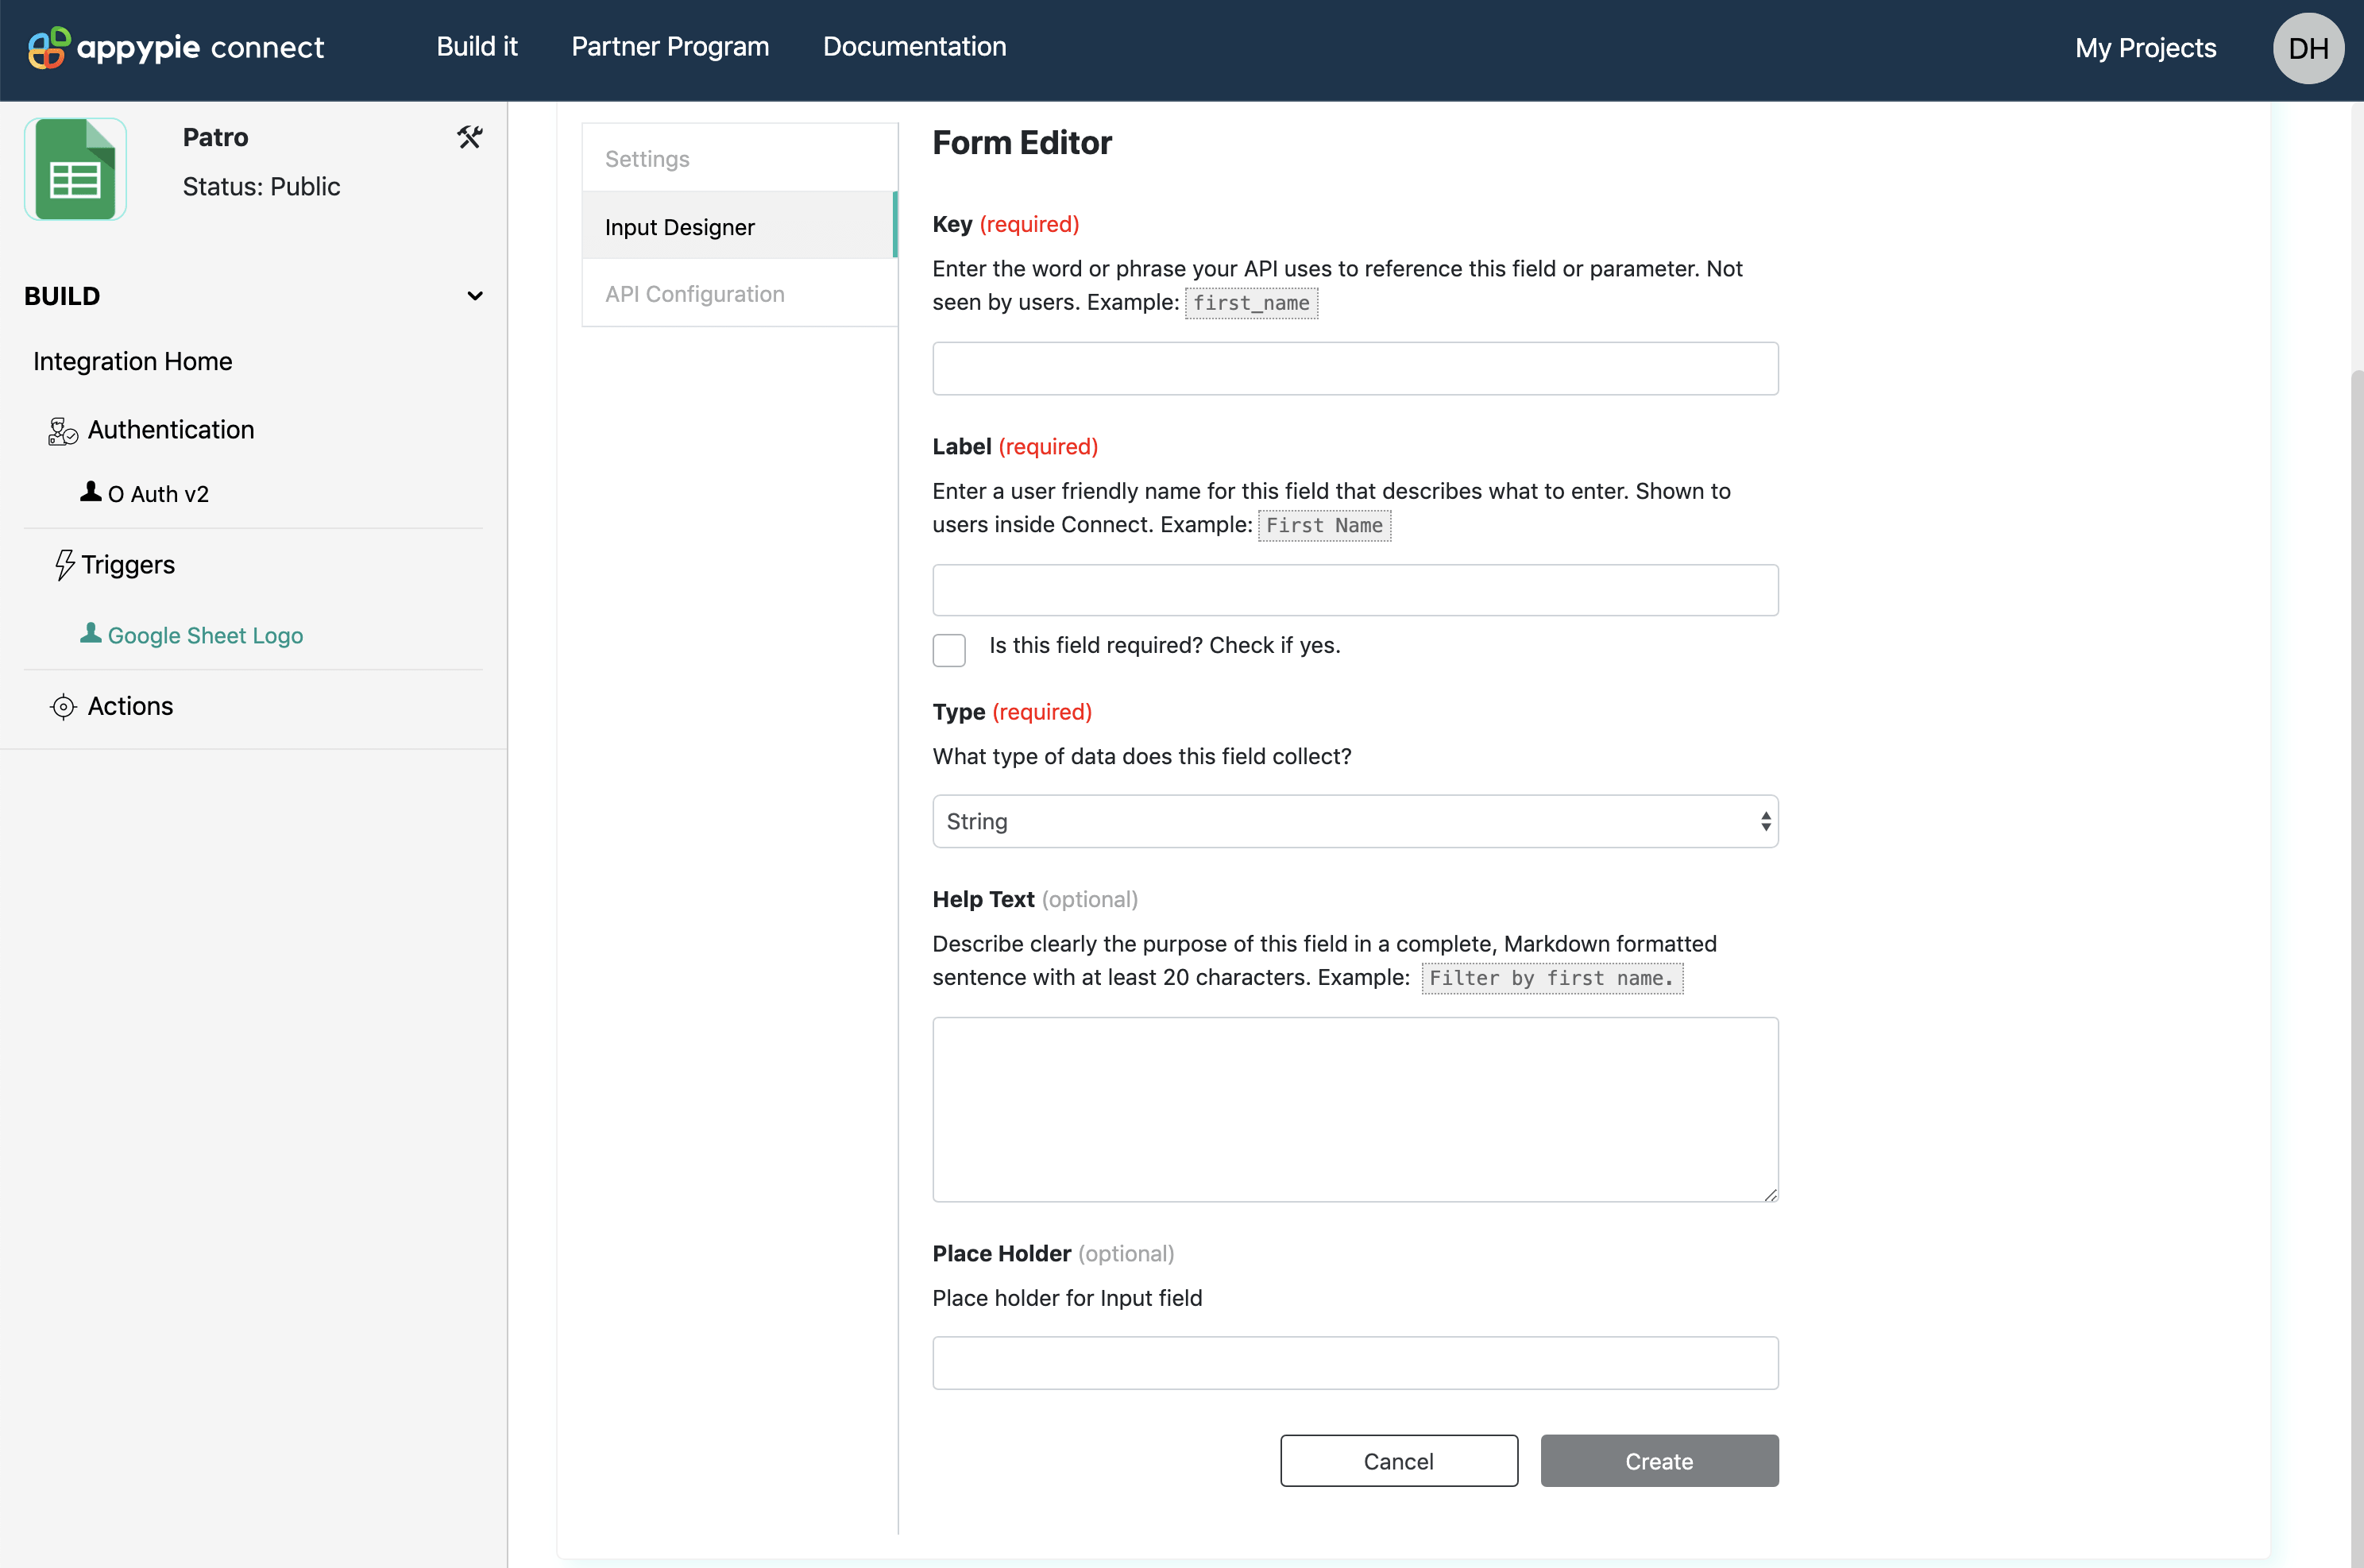
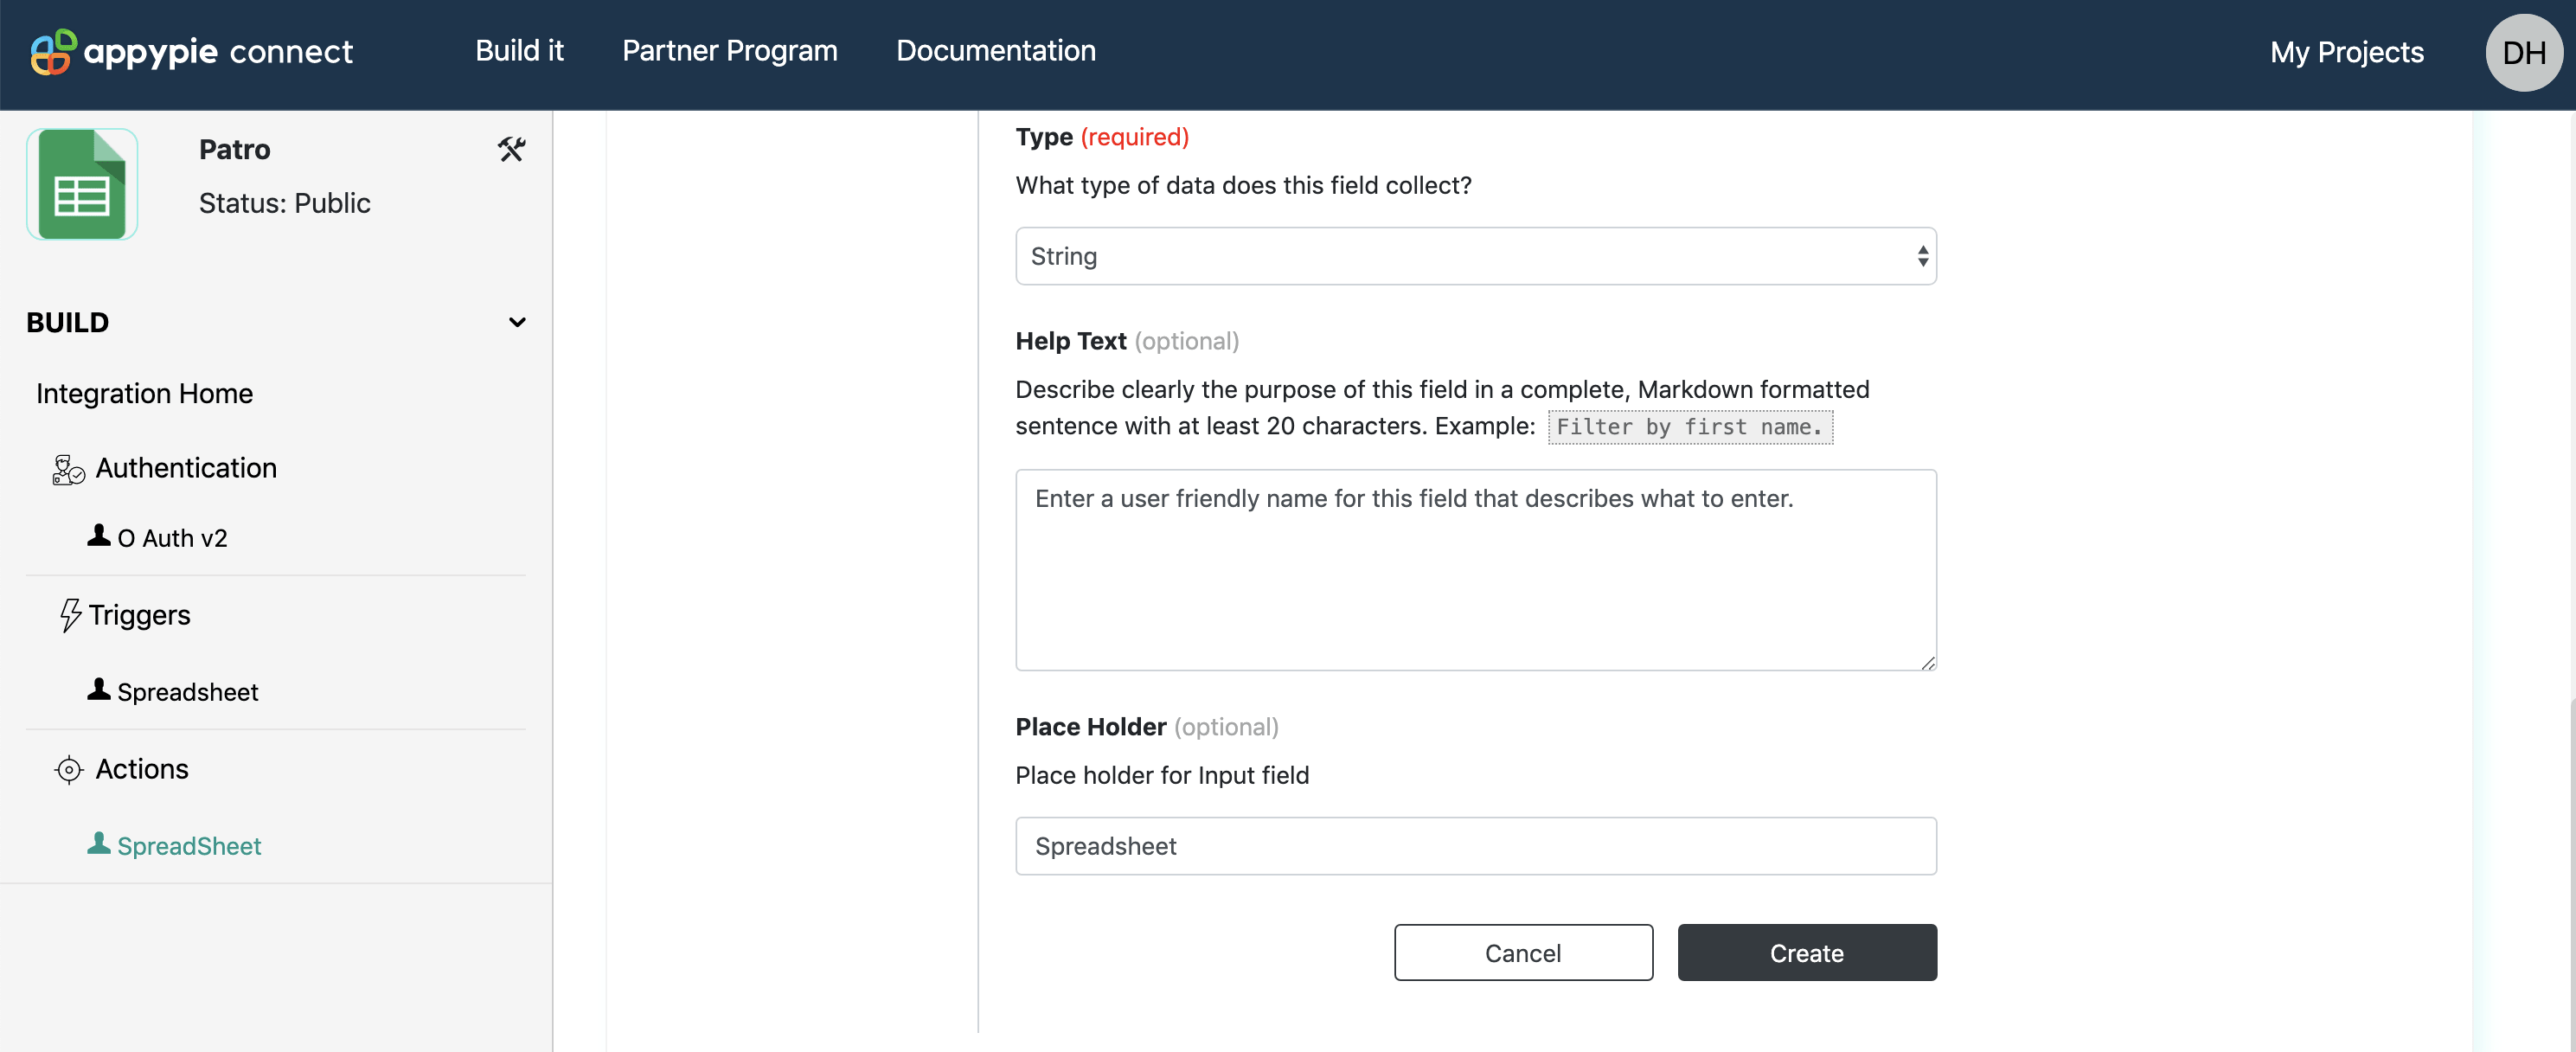
To add a field click on “Add Input User Field” and fill the details accordingly. Fill the details for:
- Key: A unique identifier specialised to match the value which your API will make a call to. This should be without any spaces such as first_name and generic according to your app
- Label: User-friendly name in order to make it convenient for the app user. For example
Company Name
- Type: Out of two field types, the
string type is set as default. Check the option details further below to know more.
- Help Text: It helps the user to describe the exact reason to fill in the details. It is markdown enabled, thus, you can enter help doc link or highlight the information according to your app feature.
- Placeholder: Enter default text that user will see as a filler before entering the real information. It can be relevant to what the user usually enters in the field.
Cross refers to every field and checks for any error, the user should be able to fill out the form according to the information required. Repeat the same steps to add more fields in input form and click save.
Set Field Options

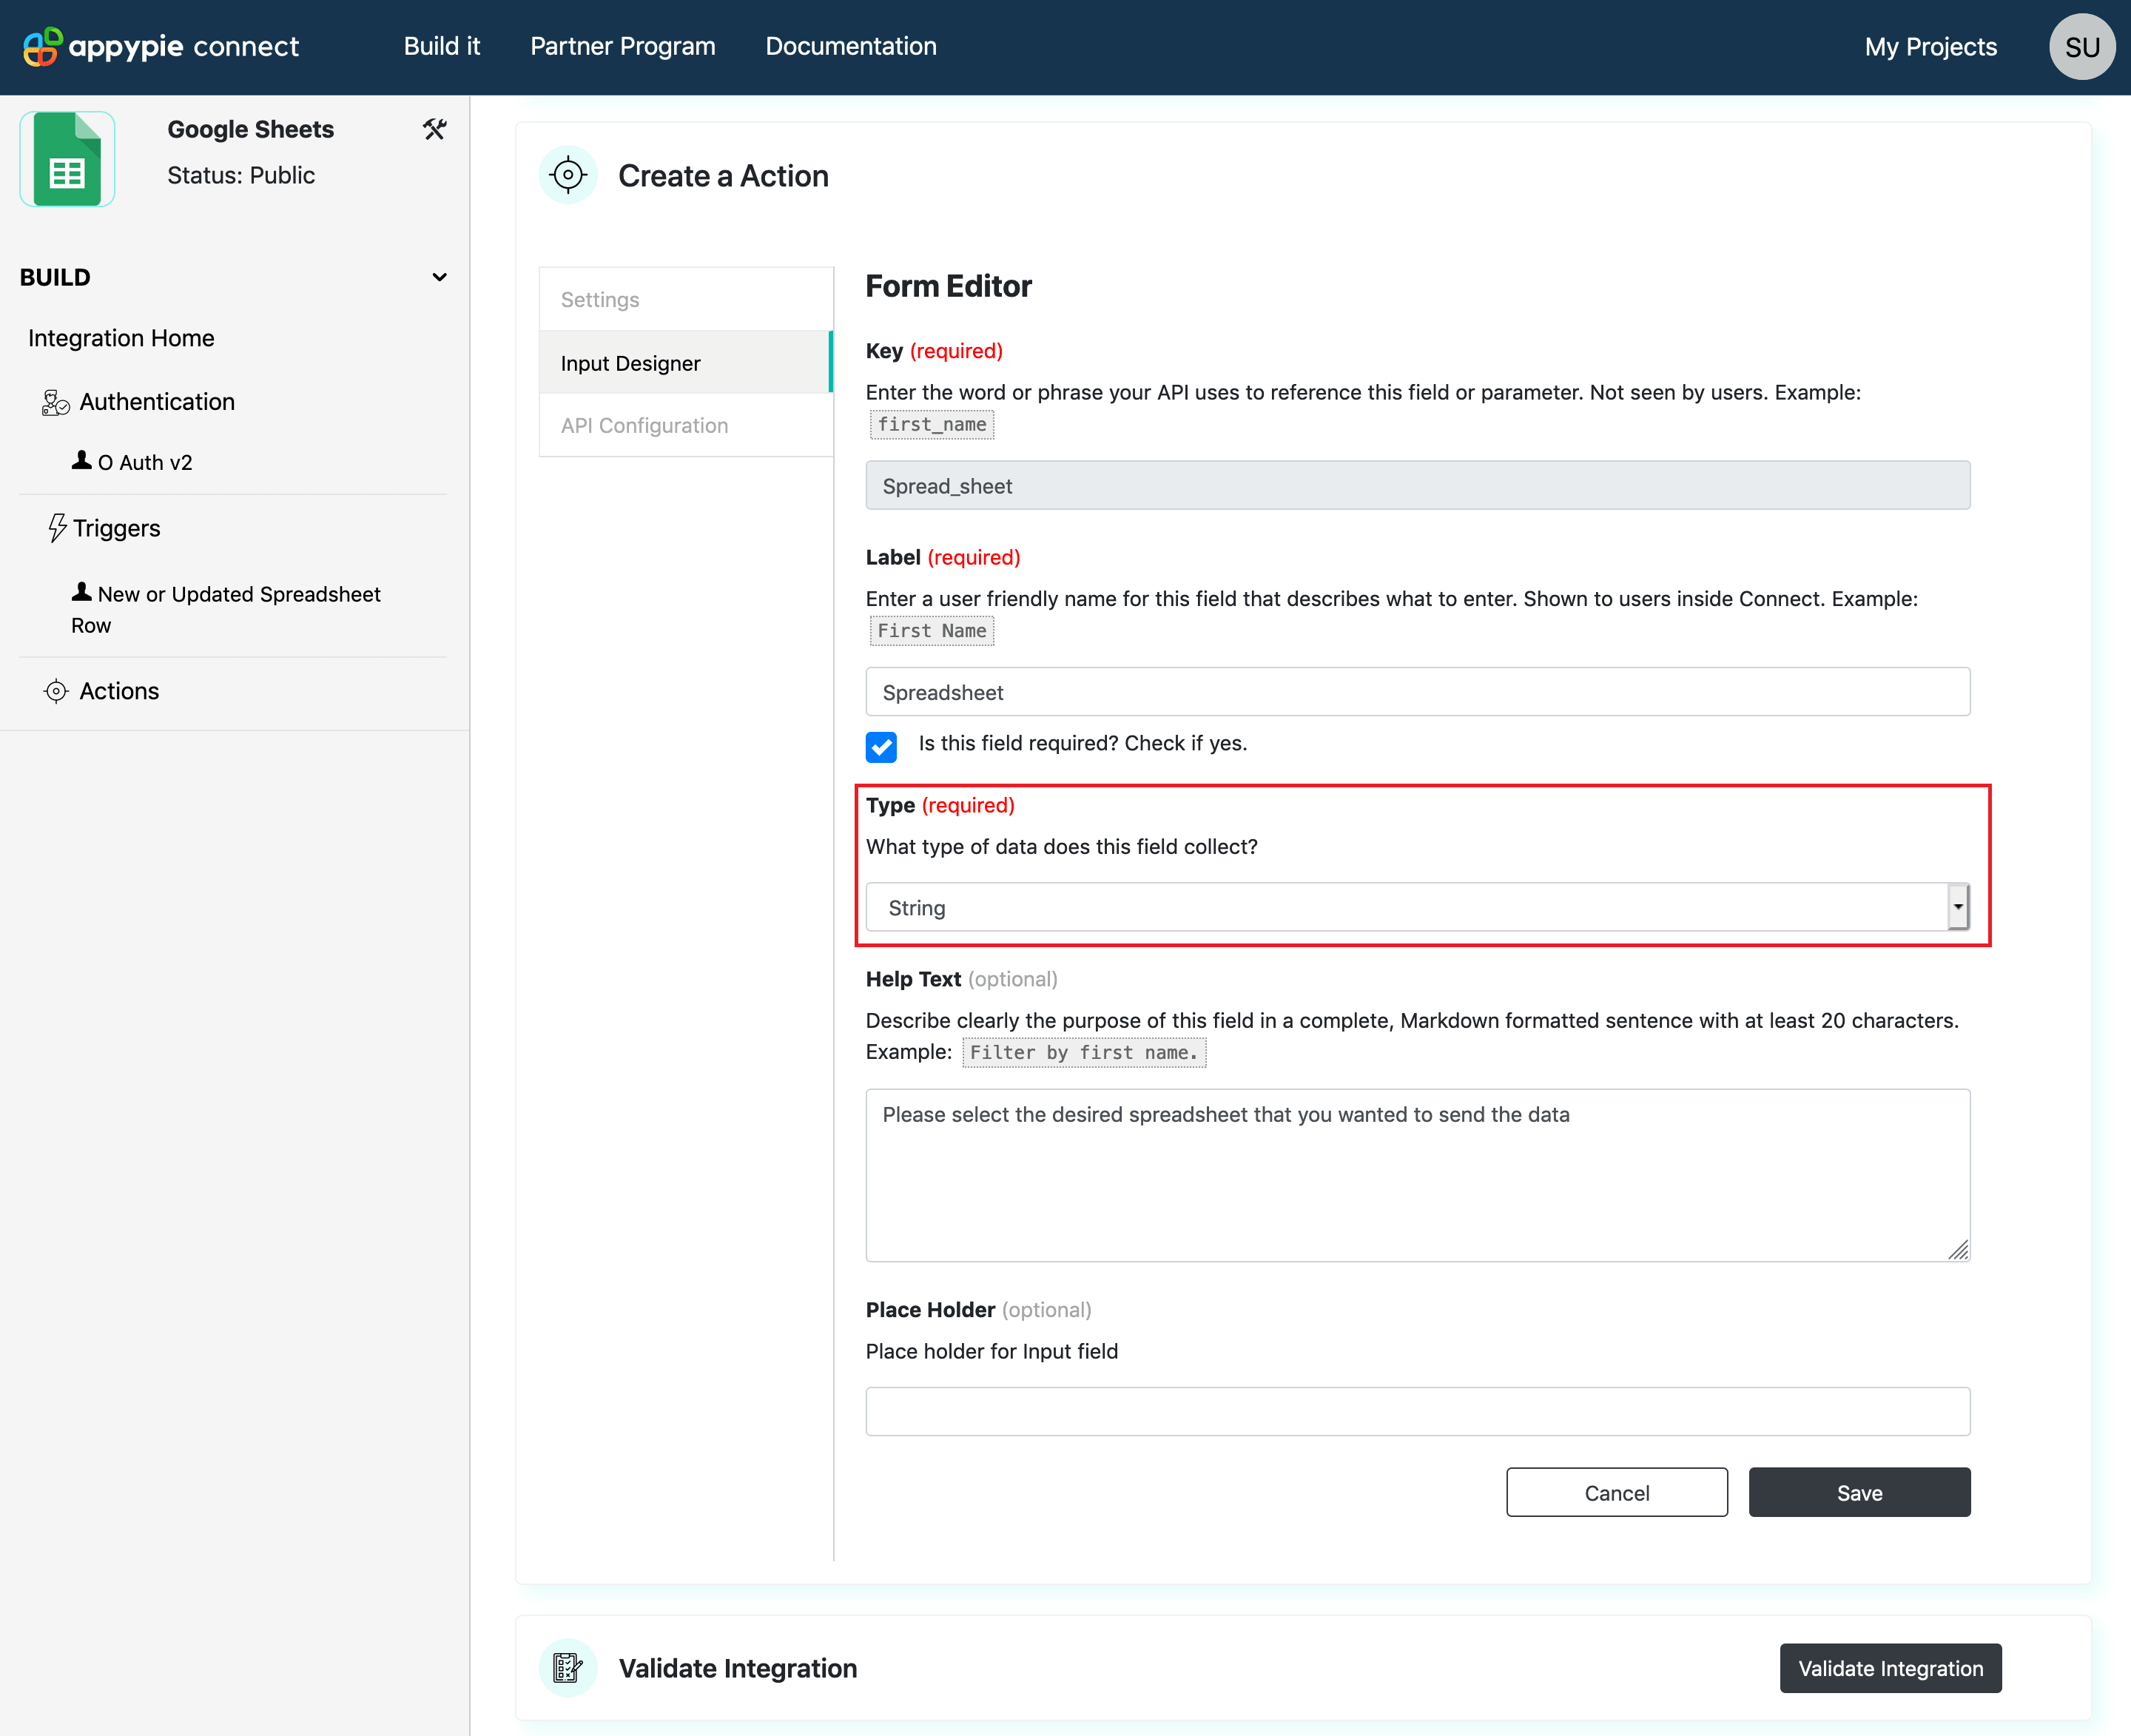
REQUIRED
Some of the inevitable information that is required by API to create, add or update information in your app are included in mostly “Required” fields. For Example, to make a Connect between Gmail and Google Sheets, Gmail ID, a Google Sheet are must.
Appy Pie Connect will not proceed further without the proper information being filled in “Required” marked fields. The user will be alerted to fill the proper information in case of any mistake or missing information. Once the information is filled, the Appy Pie Connect will process and move further.
Additional information can be filled with required marked fields in “Help Text” to help your app user in adding data with proper information.
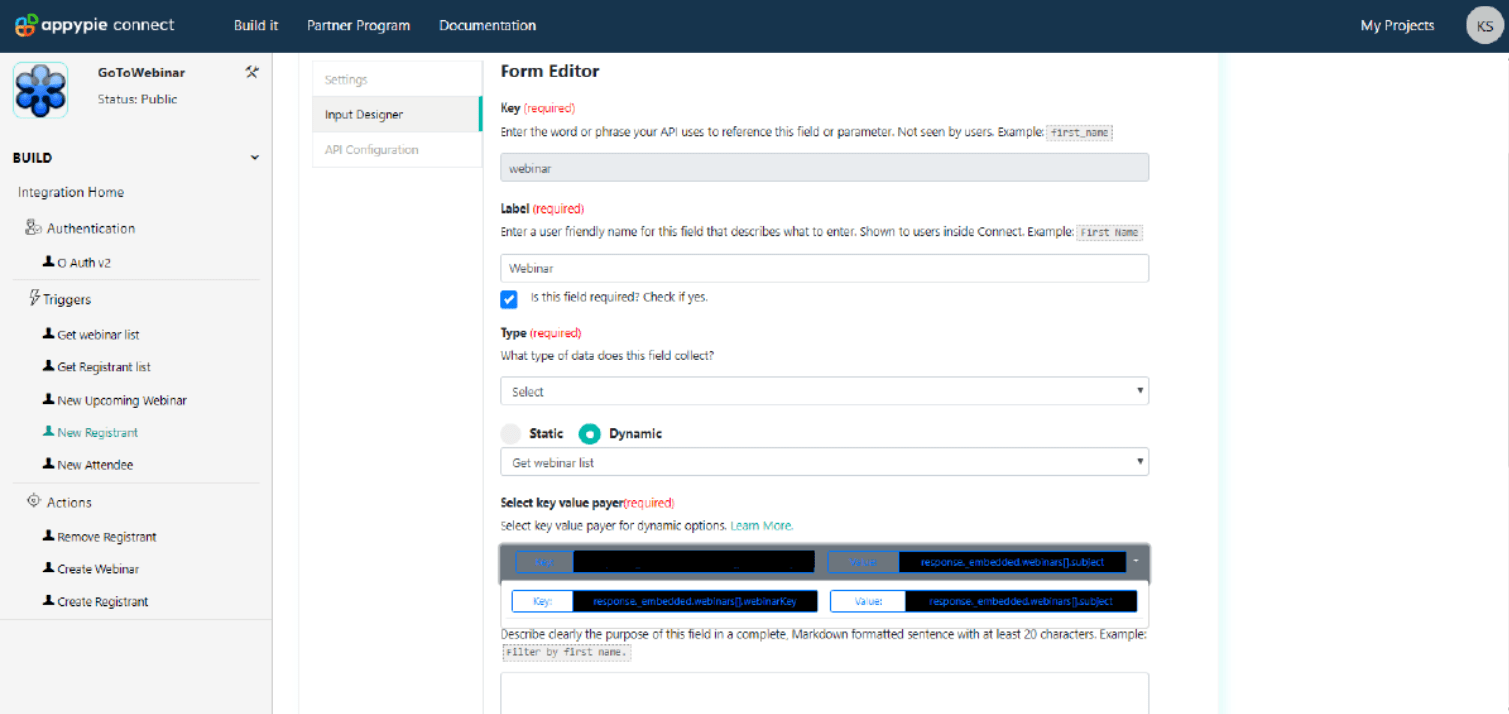
TYPE - Select Dropdown
If you want to set a predefined option in field form then “Select” is opted in field TYPE This will let the user choose between the various options that you will provide in the form field or will fetch dynamically from the API calls. There are two main types of select dropdowns available. Let’s go further to explain the options in detail.
Static Dropdown
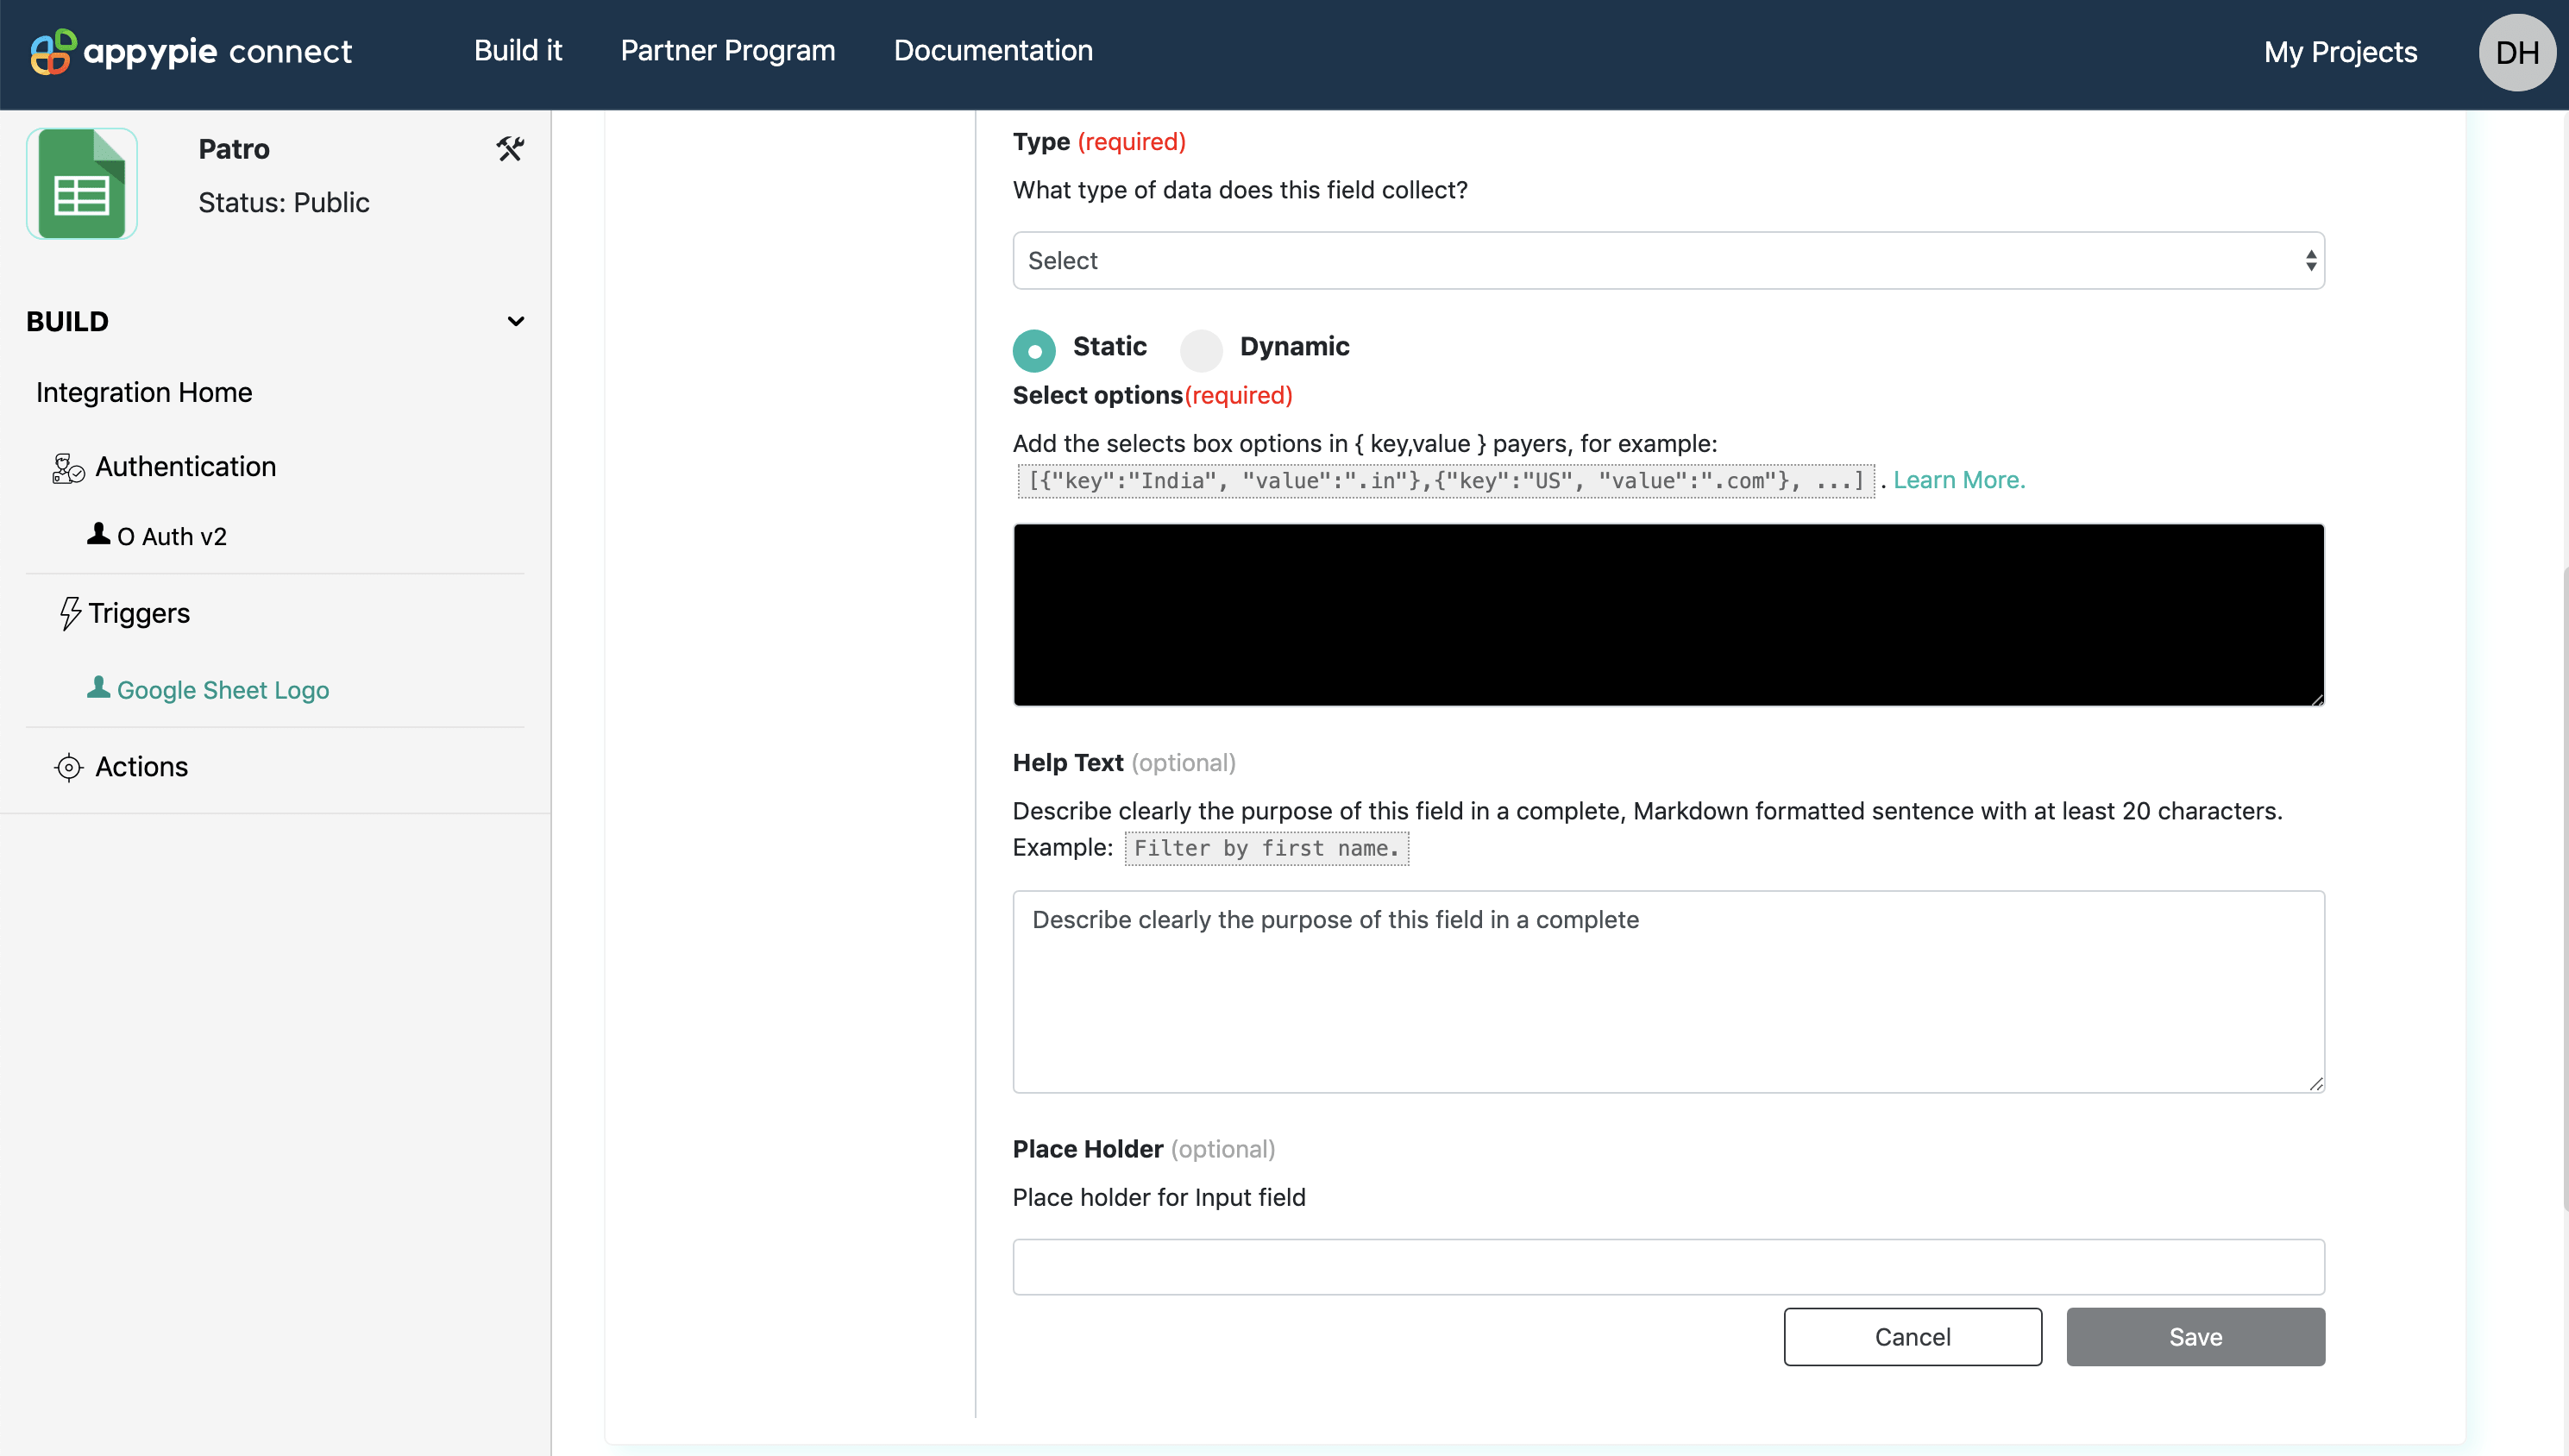
Under Type >> Select the first or the default option available is “Static”, here you can add the drop-down options for the user to select and make the referable entry. This will work as a static menu and you can add the options with a comma-separated list entered with a square bracket such as:
[{"key":"India", "value":".in"},{"key":"US", "value":".com" },]
Enter the fields as per the requirement of your API, Appy Pie Connect will pass the same values for the user to make the selection against your app. Connect has the facility to Capitalize and insert space in between the different field names.
The same scenario follows in the case of different values required, pair value shall be entered to send in your API. Sample values should be shown to the user with the typically real-time example to help them in making a better selection. For example: to enter a country name, show the real country name such as “India” against the field where it is required.
Use curly brackets to insert the menu items with sample, value and labels separated by the comma. Remember to insert the item list and value in respective order while quoting both of them. Each of such menu items must be separated with commas while wrapping the whole set in square brackets.
Dynamic Dropdown
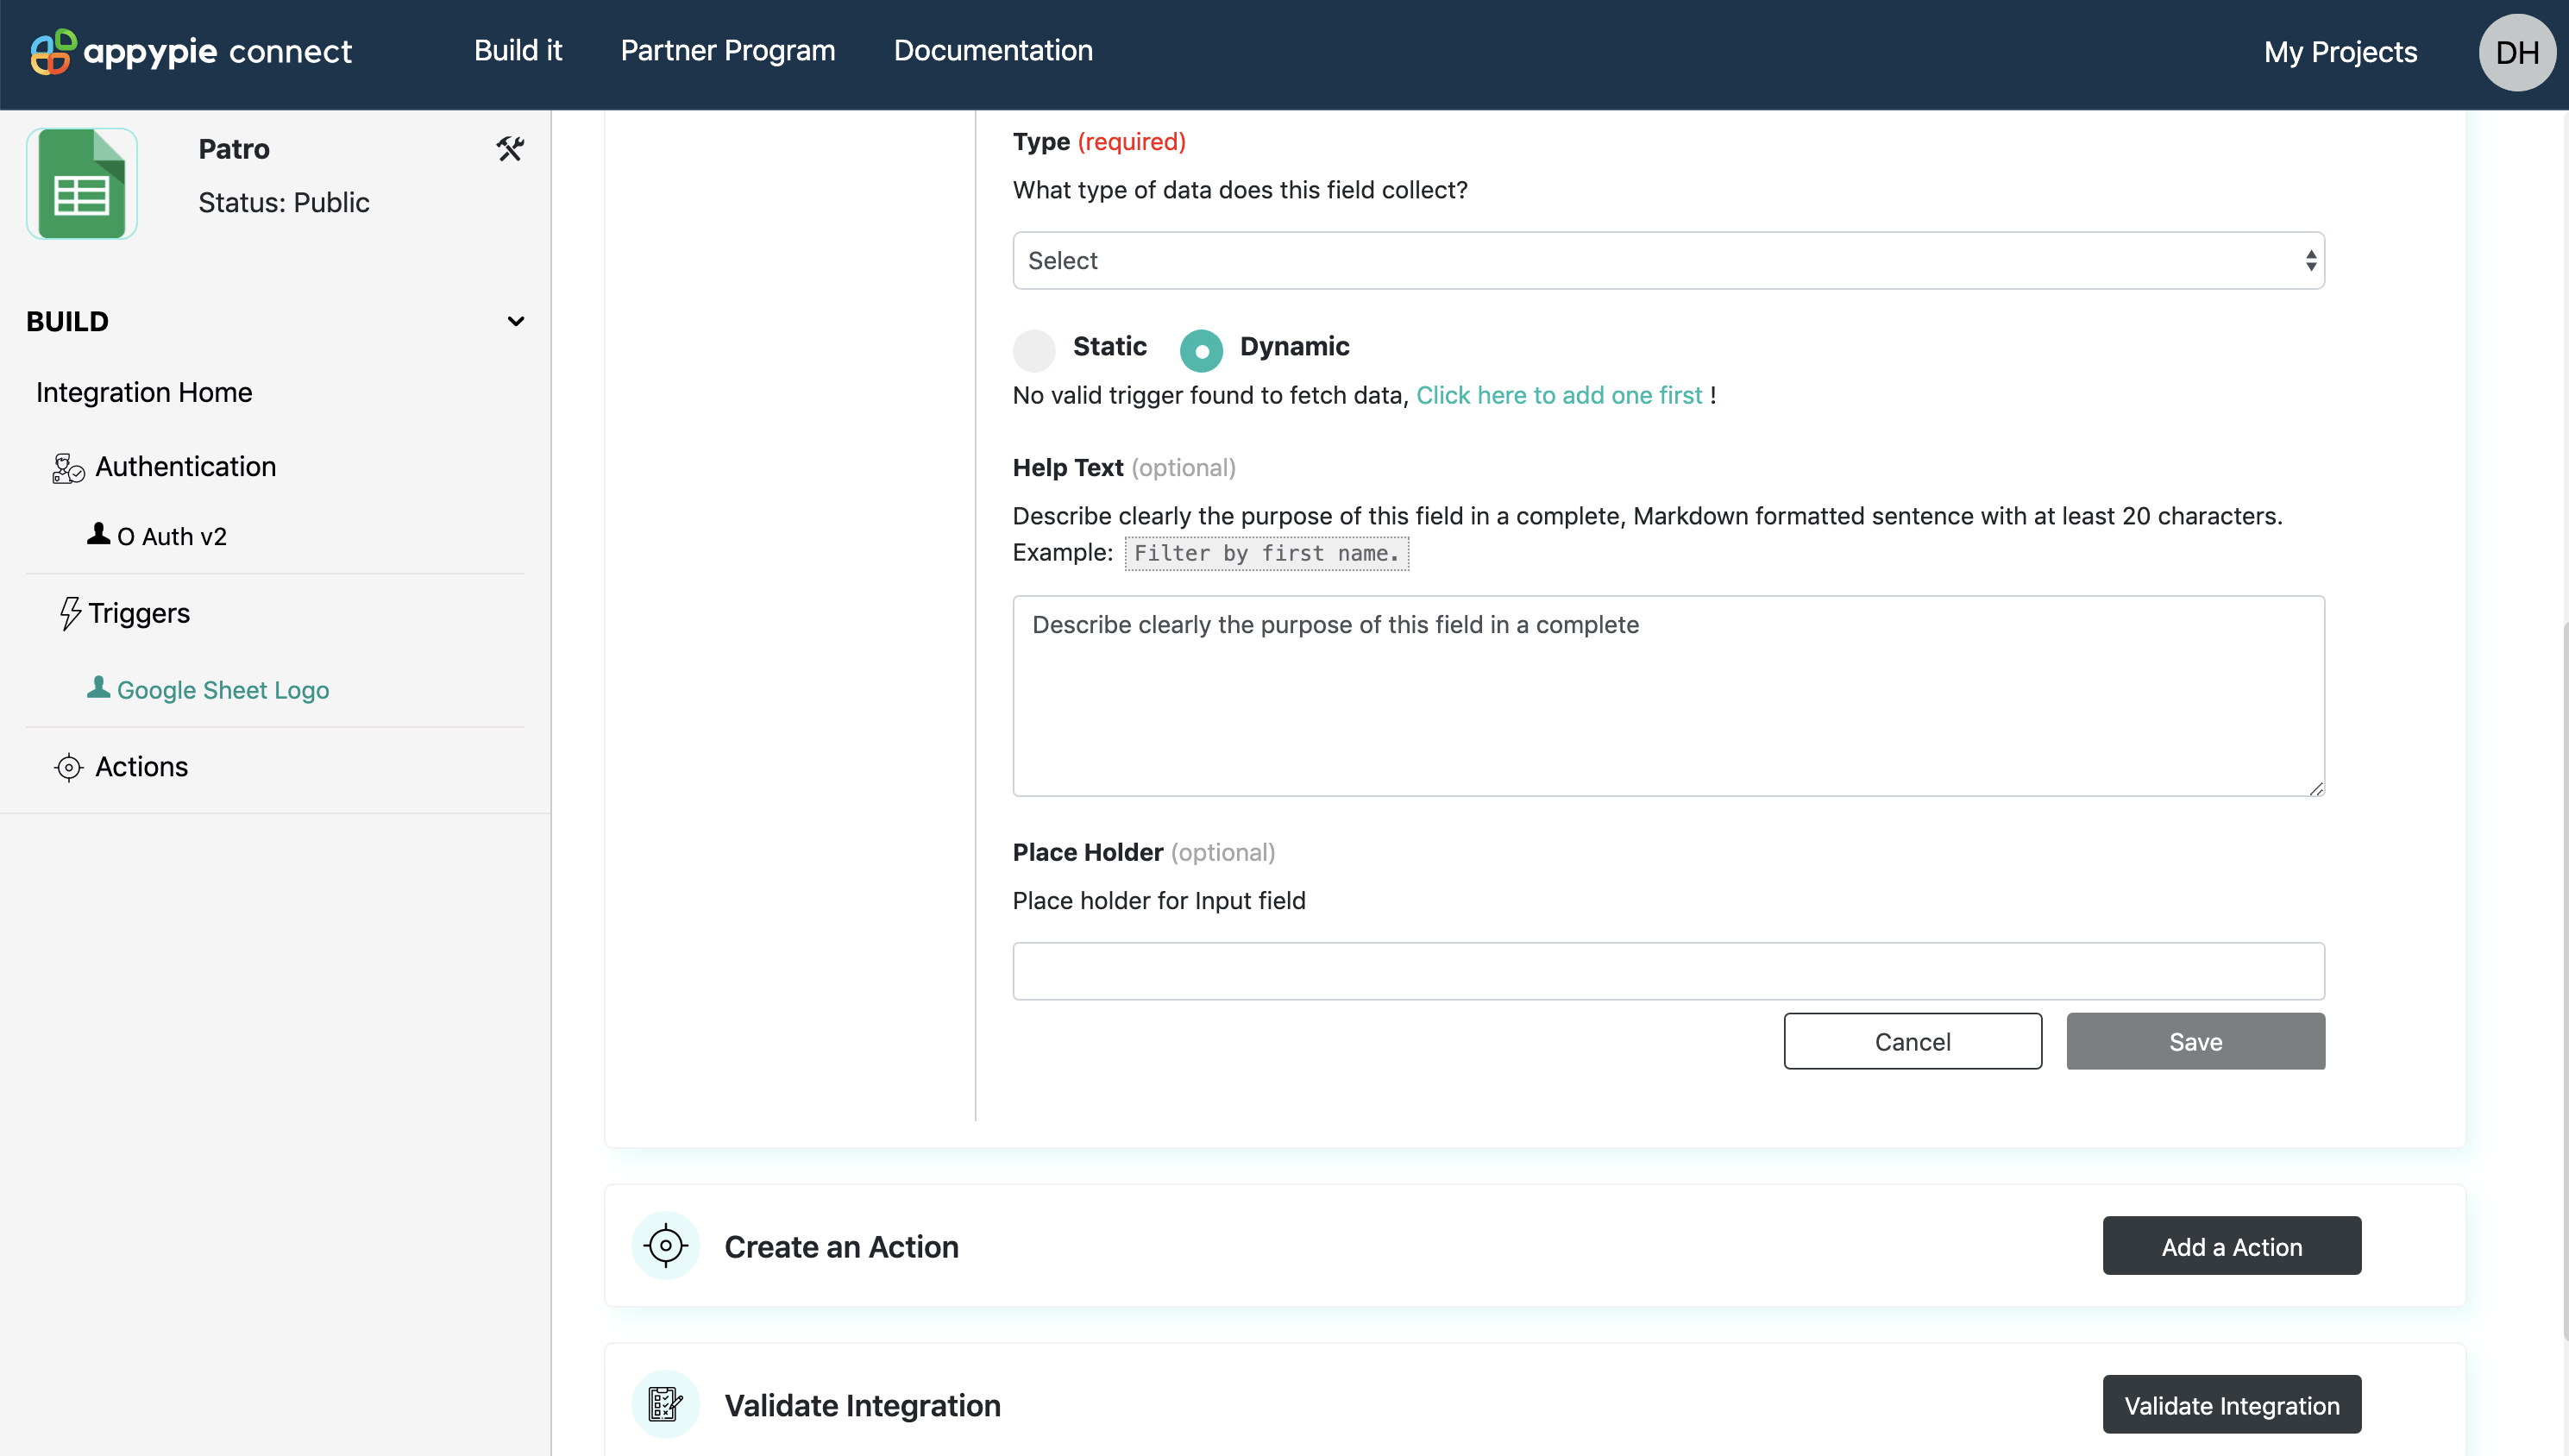
For the users to select data from their account of your app such as project, folder, specific file - dynamic drop down is required. The dynamic dropdown will first fetch the data from your app through API calls and then display it in the menu with names and data received from your API.
Appy Pie Connect works on triggers to find the dynamic dropdown menu values. Thus, it is best to build a dedicated trigger for dropdown data.
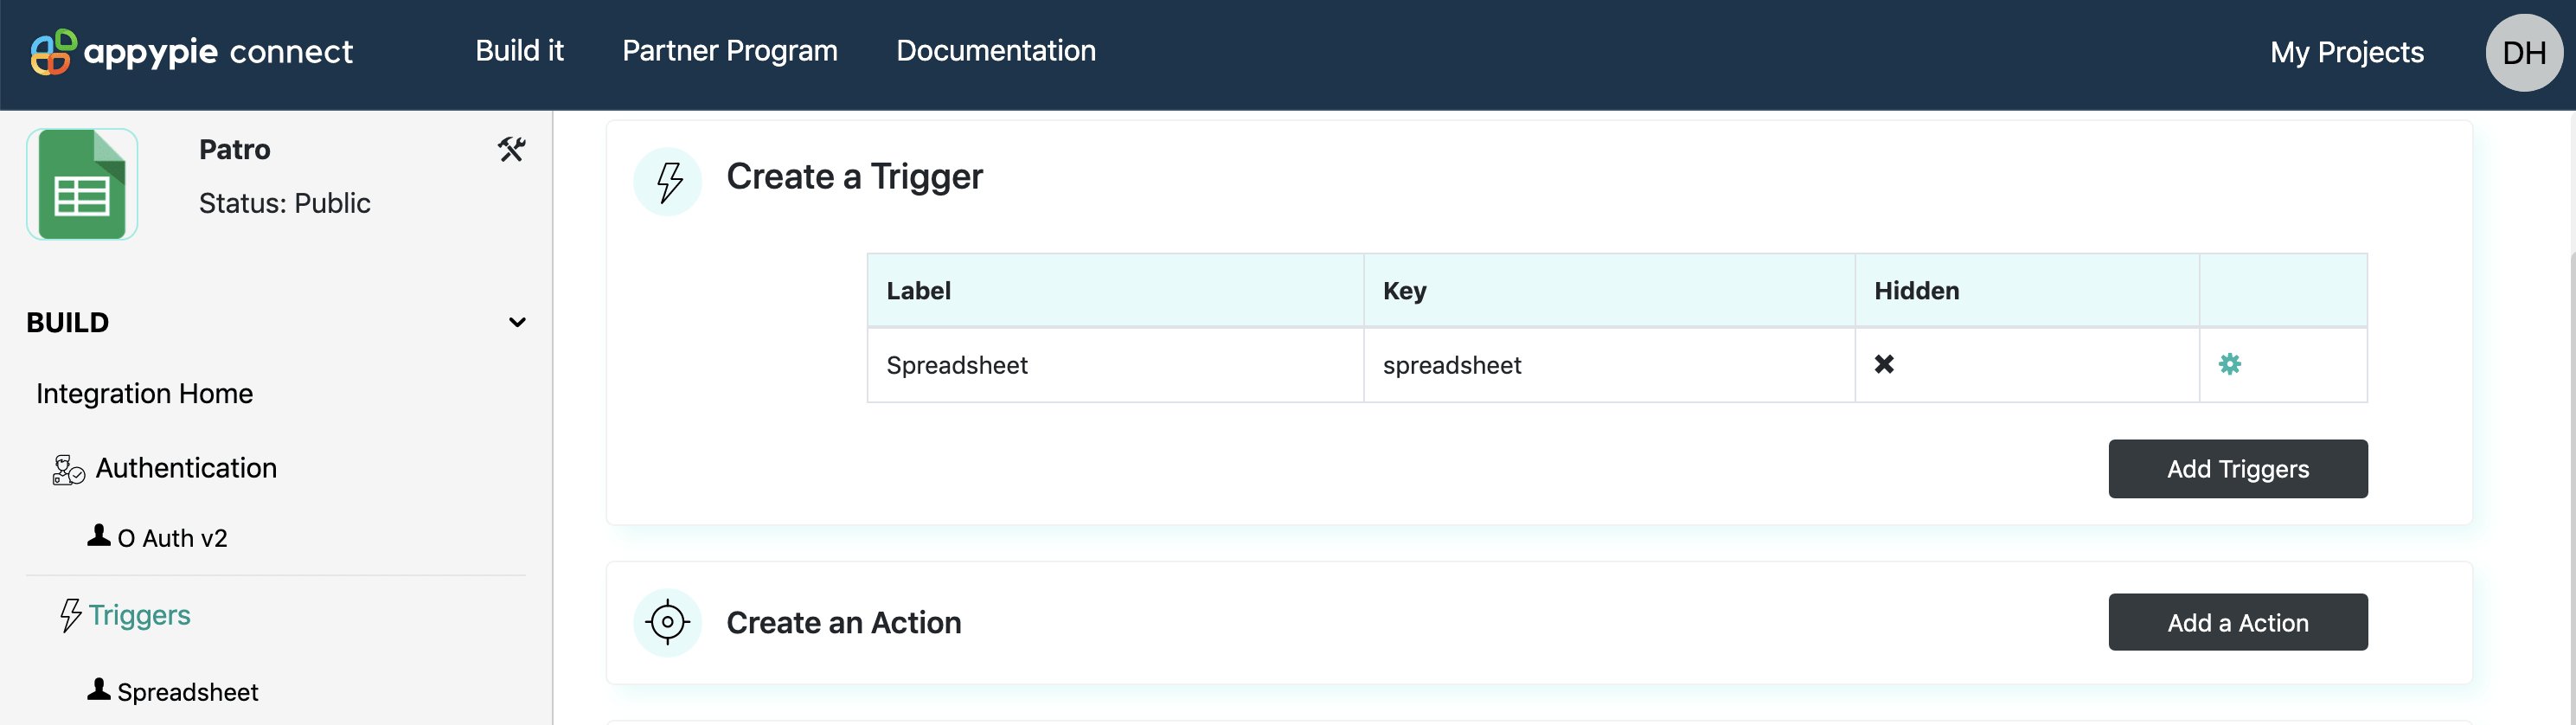
Add a trigger to get dynamic data in dropdown
For this, add an ordinary trigger while inserting its name and description. Below this, in the “settings” option itself, there is a checkbox to hide it from the users, select it in order to just use it for dynamic input. Once the trigger is Hidden it will not be shown under your trigger list to the user.
Next, skip the Input Designer tab and move to API Configuration tab as you need to add API call for Appy Pie Connect to fetch the required data dynamically from your API. Generally, API is used to fetch the updated or new information, but here, your API call will list down all the dynamic data required for the form.
At last define all the triggers you would require for your action in the input field. Also, list the same in Output fields in the settings. Minimum one field must be added in the Appy Pie Connect to include the API in Action including a user-friendly name for information in the field.
Add labels, key and trigger data to build a proper dynamic dropdown. Test with adding the human-friendly field name, label menu to pull real data. This will help your user to get the data from your API when the input field of dynamic data defined is selected.
Reorder Fields
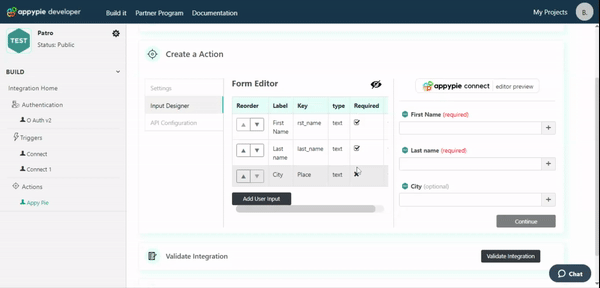
Check the preview of the form and make the changes in the order of the form fields using the arrows.
Add fields as per your requirement and arrange them later, Appy Pie Connect brings the facility to use the form editor to edit the order in which the form fields are arranged. There are two arrows available with the form field in the form editor to arrange the options up and down. Select the order and make the adjustments accordingly. There is a preview window on the right side of the form field editor that shows how your input form will look at the user end.
All the changes made will be reflected in the real-time, form fields will be available in the same order. This helps in making it easy for the users to fill the important fields first to make the integration work faster. It also helps to keep the relevant fields grouped together, such as Email ID and Password. You can arrange the form fields in similar order as they are in your website, or app.
Note There is an eye icon with the Input Field Designer Form that can be used to hide or see the form preview at Appy Pie Connect.
Remove Fields
You can delete any unwanted or repetitive field from your integration
In any such cases where you find that the field is not required anymore, you can simply delete it from your integration. There can be a simple start over if you need to make fresh fields available for the app users.
To delete the field from Input Designer, there is a setting option with the field name
in which “Edit” & “Delete” options are available. Select the Delete option to remove the field not required. Appy Pie Connect will ask to reconfirm the field you want to delete, select carefully. Any field deleted will be removed from the integration and there is no backup available to restore the same field in it. It is suggested not to make such changes on the live integration, rather, make a new integration, and before changing it as a backup.
Types Of Input Field In Appy Pie Connect
Currently, Appy Pie Connect supports String & Text type input fields to collect data for different app operations in Connect. All the input fields accept String & Text type data but, there is no filter to test the authenticity of the information being entered in the same format. The String option is set as default and it is currently being adapted globally.
String
By default, Appy Pie Connect is using String type input field. To gather the information it shows a blank text field where the values such as email address, name etc can be added.
Text
This is typically for the longer text inputs where detailed information is required. Users will be able to write descriptions such as notes, messages or similar information.
How to Add Dynamic Fields
Appy Pie Connect caters the option to add dynamic fields from API calls and help the user to enter the data on the basis of results fetched on the basis of dynamic input. It helps the user build the Connects using the data which is mostly preferred in the case of CRM’s or project management apps where the user will get the data from different apps available in the Appy Pie Connect.
Including Dynamic Fields in API Calls
To add the dynamic field in API calls after completing the addition of same in Input Designer step, move to API Configuration tab. Add Endpoint Configuration URL with { ...bundle.inputData } to add Dynamic fields in API calls.
Testing Dynamic Fields
Once the API Configuration URL is set, Appy Pie Connect asks to test the API configuration. This will help to test the dynamic field information being fetched from API calls or not. Add actual account details and test whether your app is giving the desired output or not.