Setting Up Authentication

OAuth2 is the most commonly used authentication method, thus it is preferred at Appy Pie Automate.
Integration depends upon authentication with your API, the data required to make access to the account available. Thus, it is crucial to set the authentication properly. To use your app in Appy Pie Automate, a user will be required to insert the credentials to authenticate his account in the app and make the desired connection with other apps.
A pop-up window will open in front of the user whenever he starts a new connection and selects your app. With the help of OAuth2, the permissions to access the account will be added. It can also automatically fetch the details of the user account that has already been logged in.
This can be done in the following steps -
Select Your Authentication
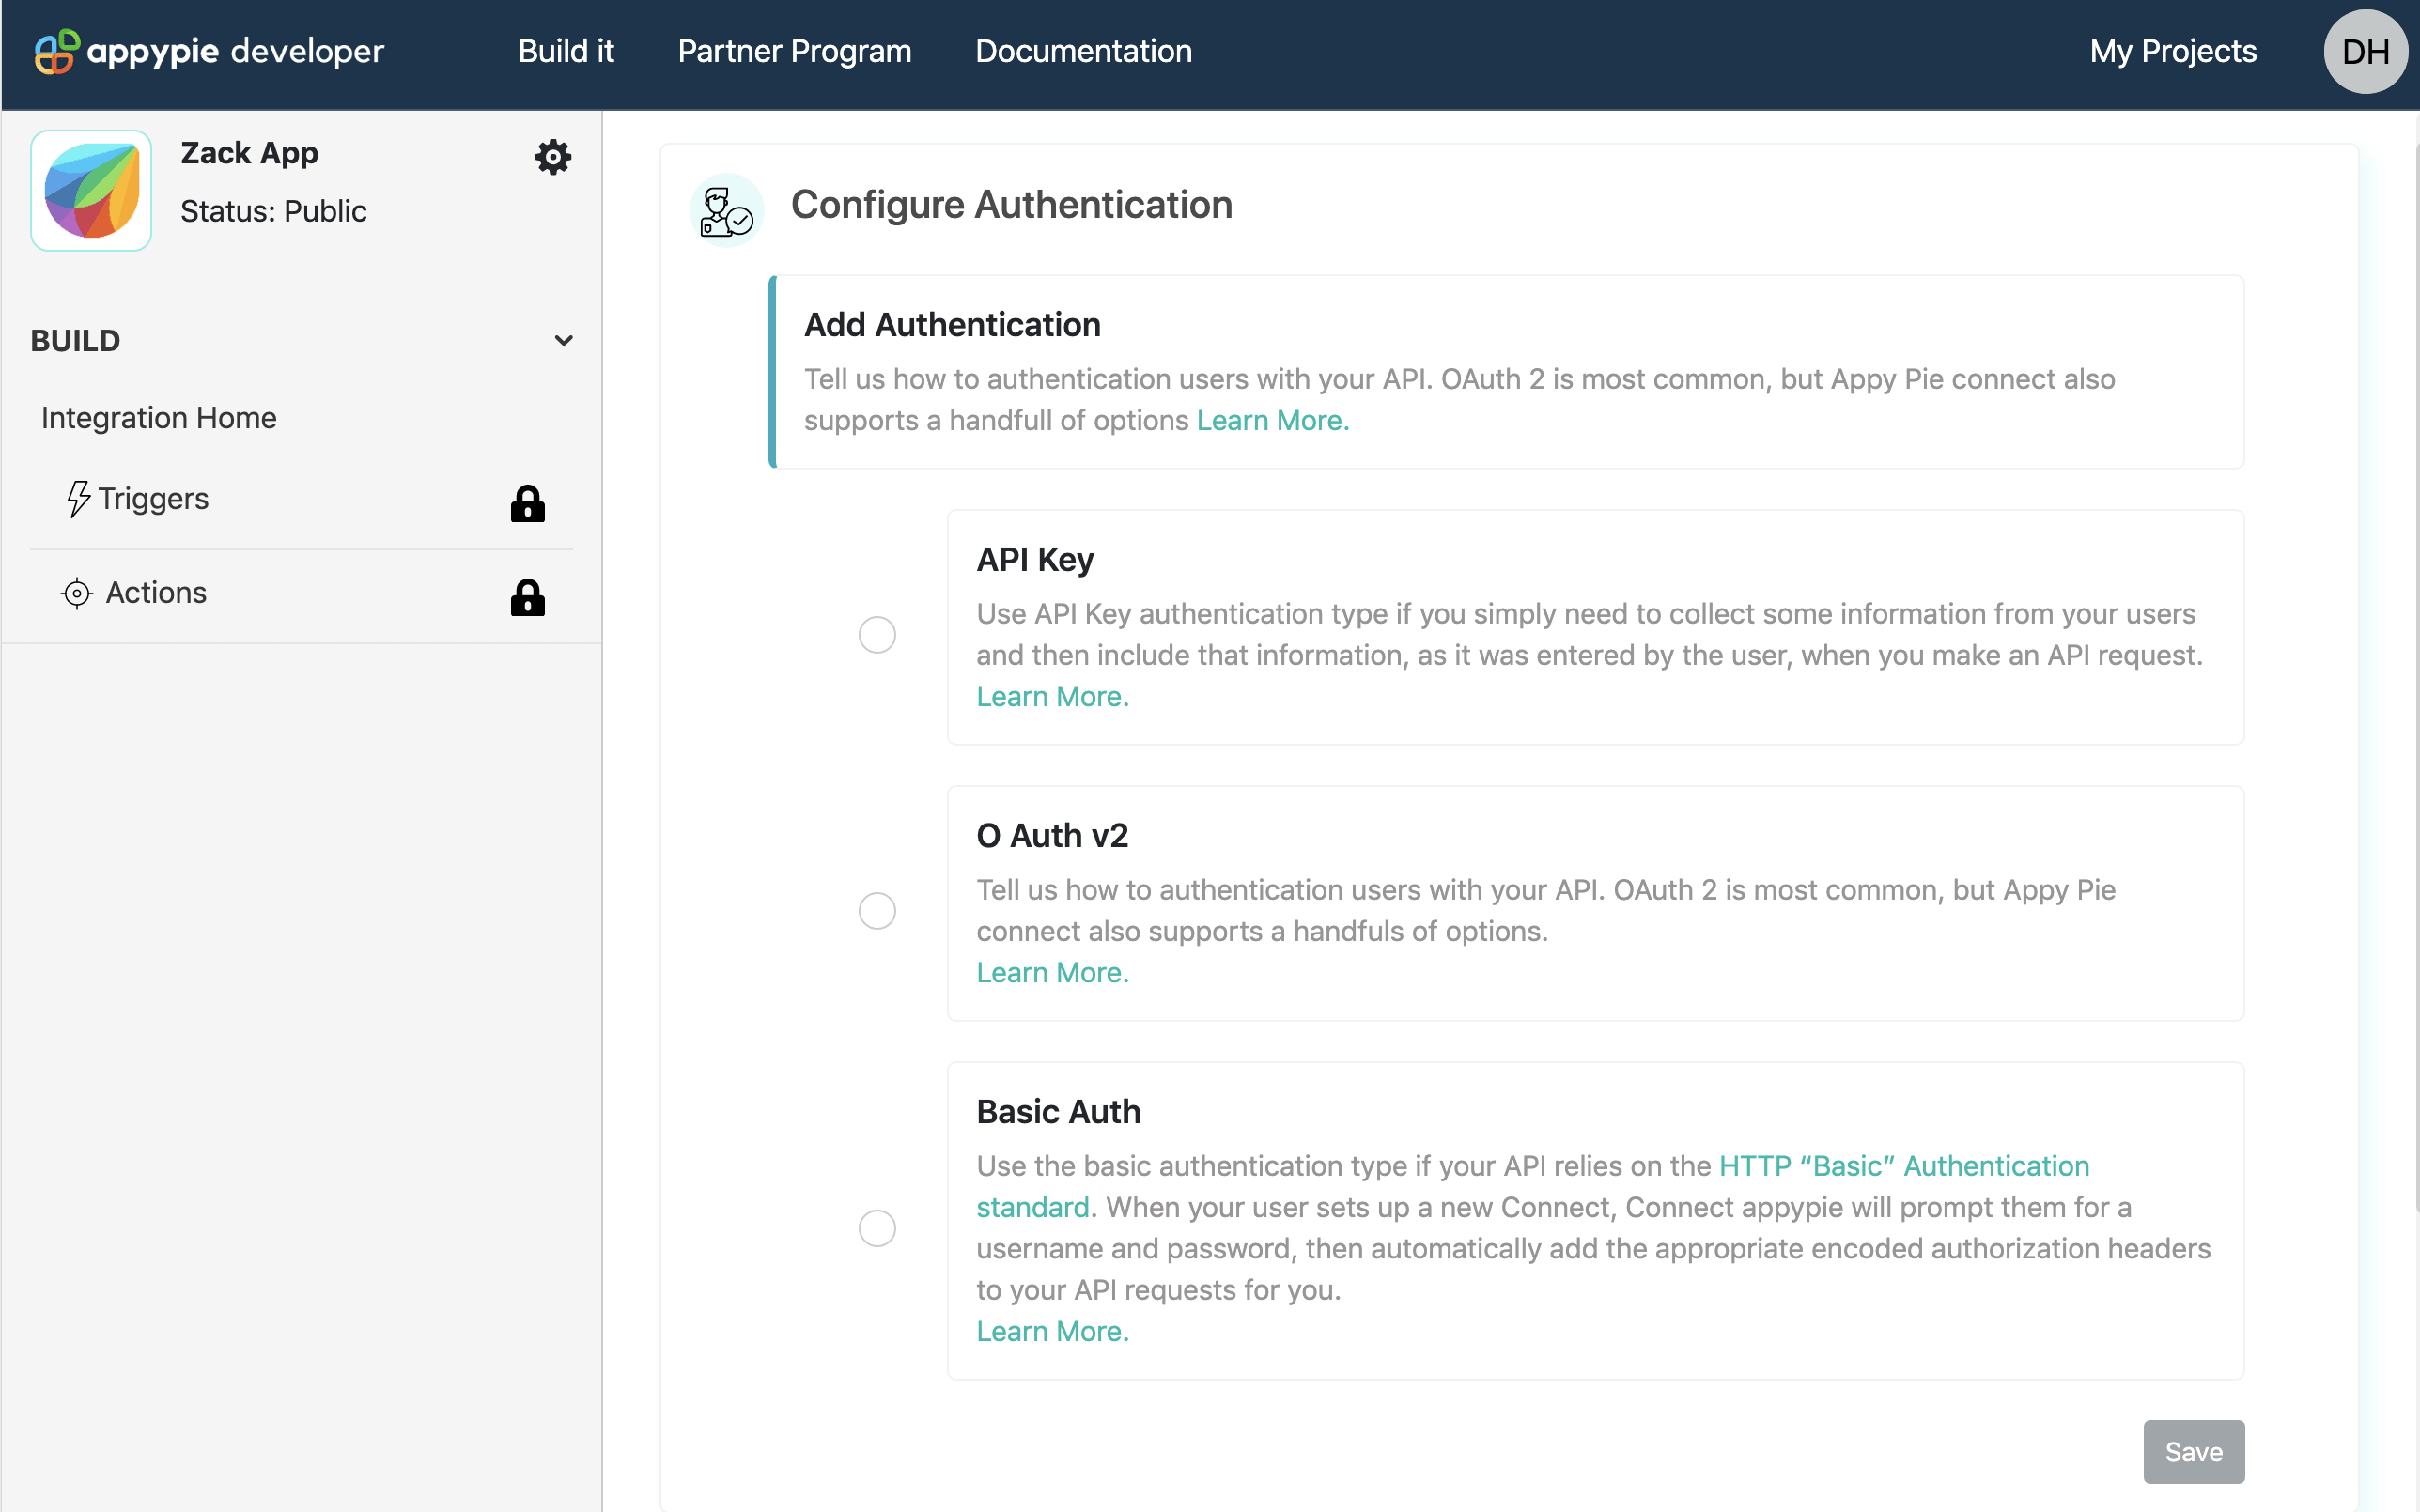
Select the OAuth2 authentication method for your app at Appy Pie Automate. Click on the authentication tab and OAuth2 authentication will be available on the menu to create a form with input fields. The form should be able to collect the username and password automatically to authorize Google Sheet integration.
Add Authentication Details

Build a form with fields for each item that your API requires for authentication, including a field for your API key and an additional field for any other relevant data needed. It can be skipped if your API doesn’t require details from the user.
Configure OAuth Redirect URL

The next step would be to copy the OAuth redirect URL and paste it in your app’s setup and add Appy Pie Automate’s OAuth redirect URL to complete the configuration. In our example, you can paste this URL in credentials created. Edit “OAuth 2.0 client IDs” in “Google Developers Console” and under “Authorized Redirect URL” paste the URL copied from the Appy Pie Automate platform and save.
Configure Client Id & Secret Keys

A Client ID (username or API Key) and Client Secret (password or API Secret) from your app shall be inserted here. The Client ID and Secret generated in the Google Developers Console can be added here to follow the example.
OAuth v2 Endpoint Configuration

For OAuth v2 Endpoint configuration you need to fill the Authorization URL, Access Token, Refresh Token, And Test primarily. Continuing with our example:
Under the Authorization, URL select the GET and put the link given below
https://accounts.google.com/o/oauth2/v2/auth
The Scope is optional and can be used to limit access of Appy pie connect’s to your app data.
Access token request shall be entered with the URL with which the access request could be sent, it is mostly POST type. For our example with the POST option insert the URL given below
https://www.googleapis.com/oauth2/v4/token
Sometimes the apps expire the access token after a certain interval of time. Thus a Refresh Token URL is required to send the access request again. To add Refresh Token Request you can use a similar URL as given above with POST.
https://www.googleapis.com/oauth2/v4/token
To Test the complete authentication you will be required to enter the Test URL. For our example, you will be required to go back to the Google Developers Console and add another API. “Enable APIS and Services” and search “Google People API” and “Enable” it. Once done with it, visit our platform where the test URL was to be inserted and add the URL given below.
https://people.googleapis.com/v1/people/me
After completing this setting, press the “Save & Continue” option.
Test your Authentication Configuration

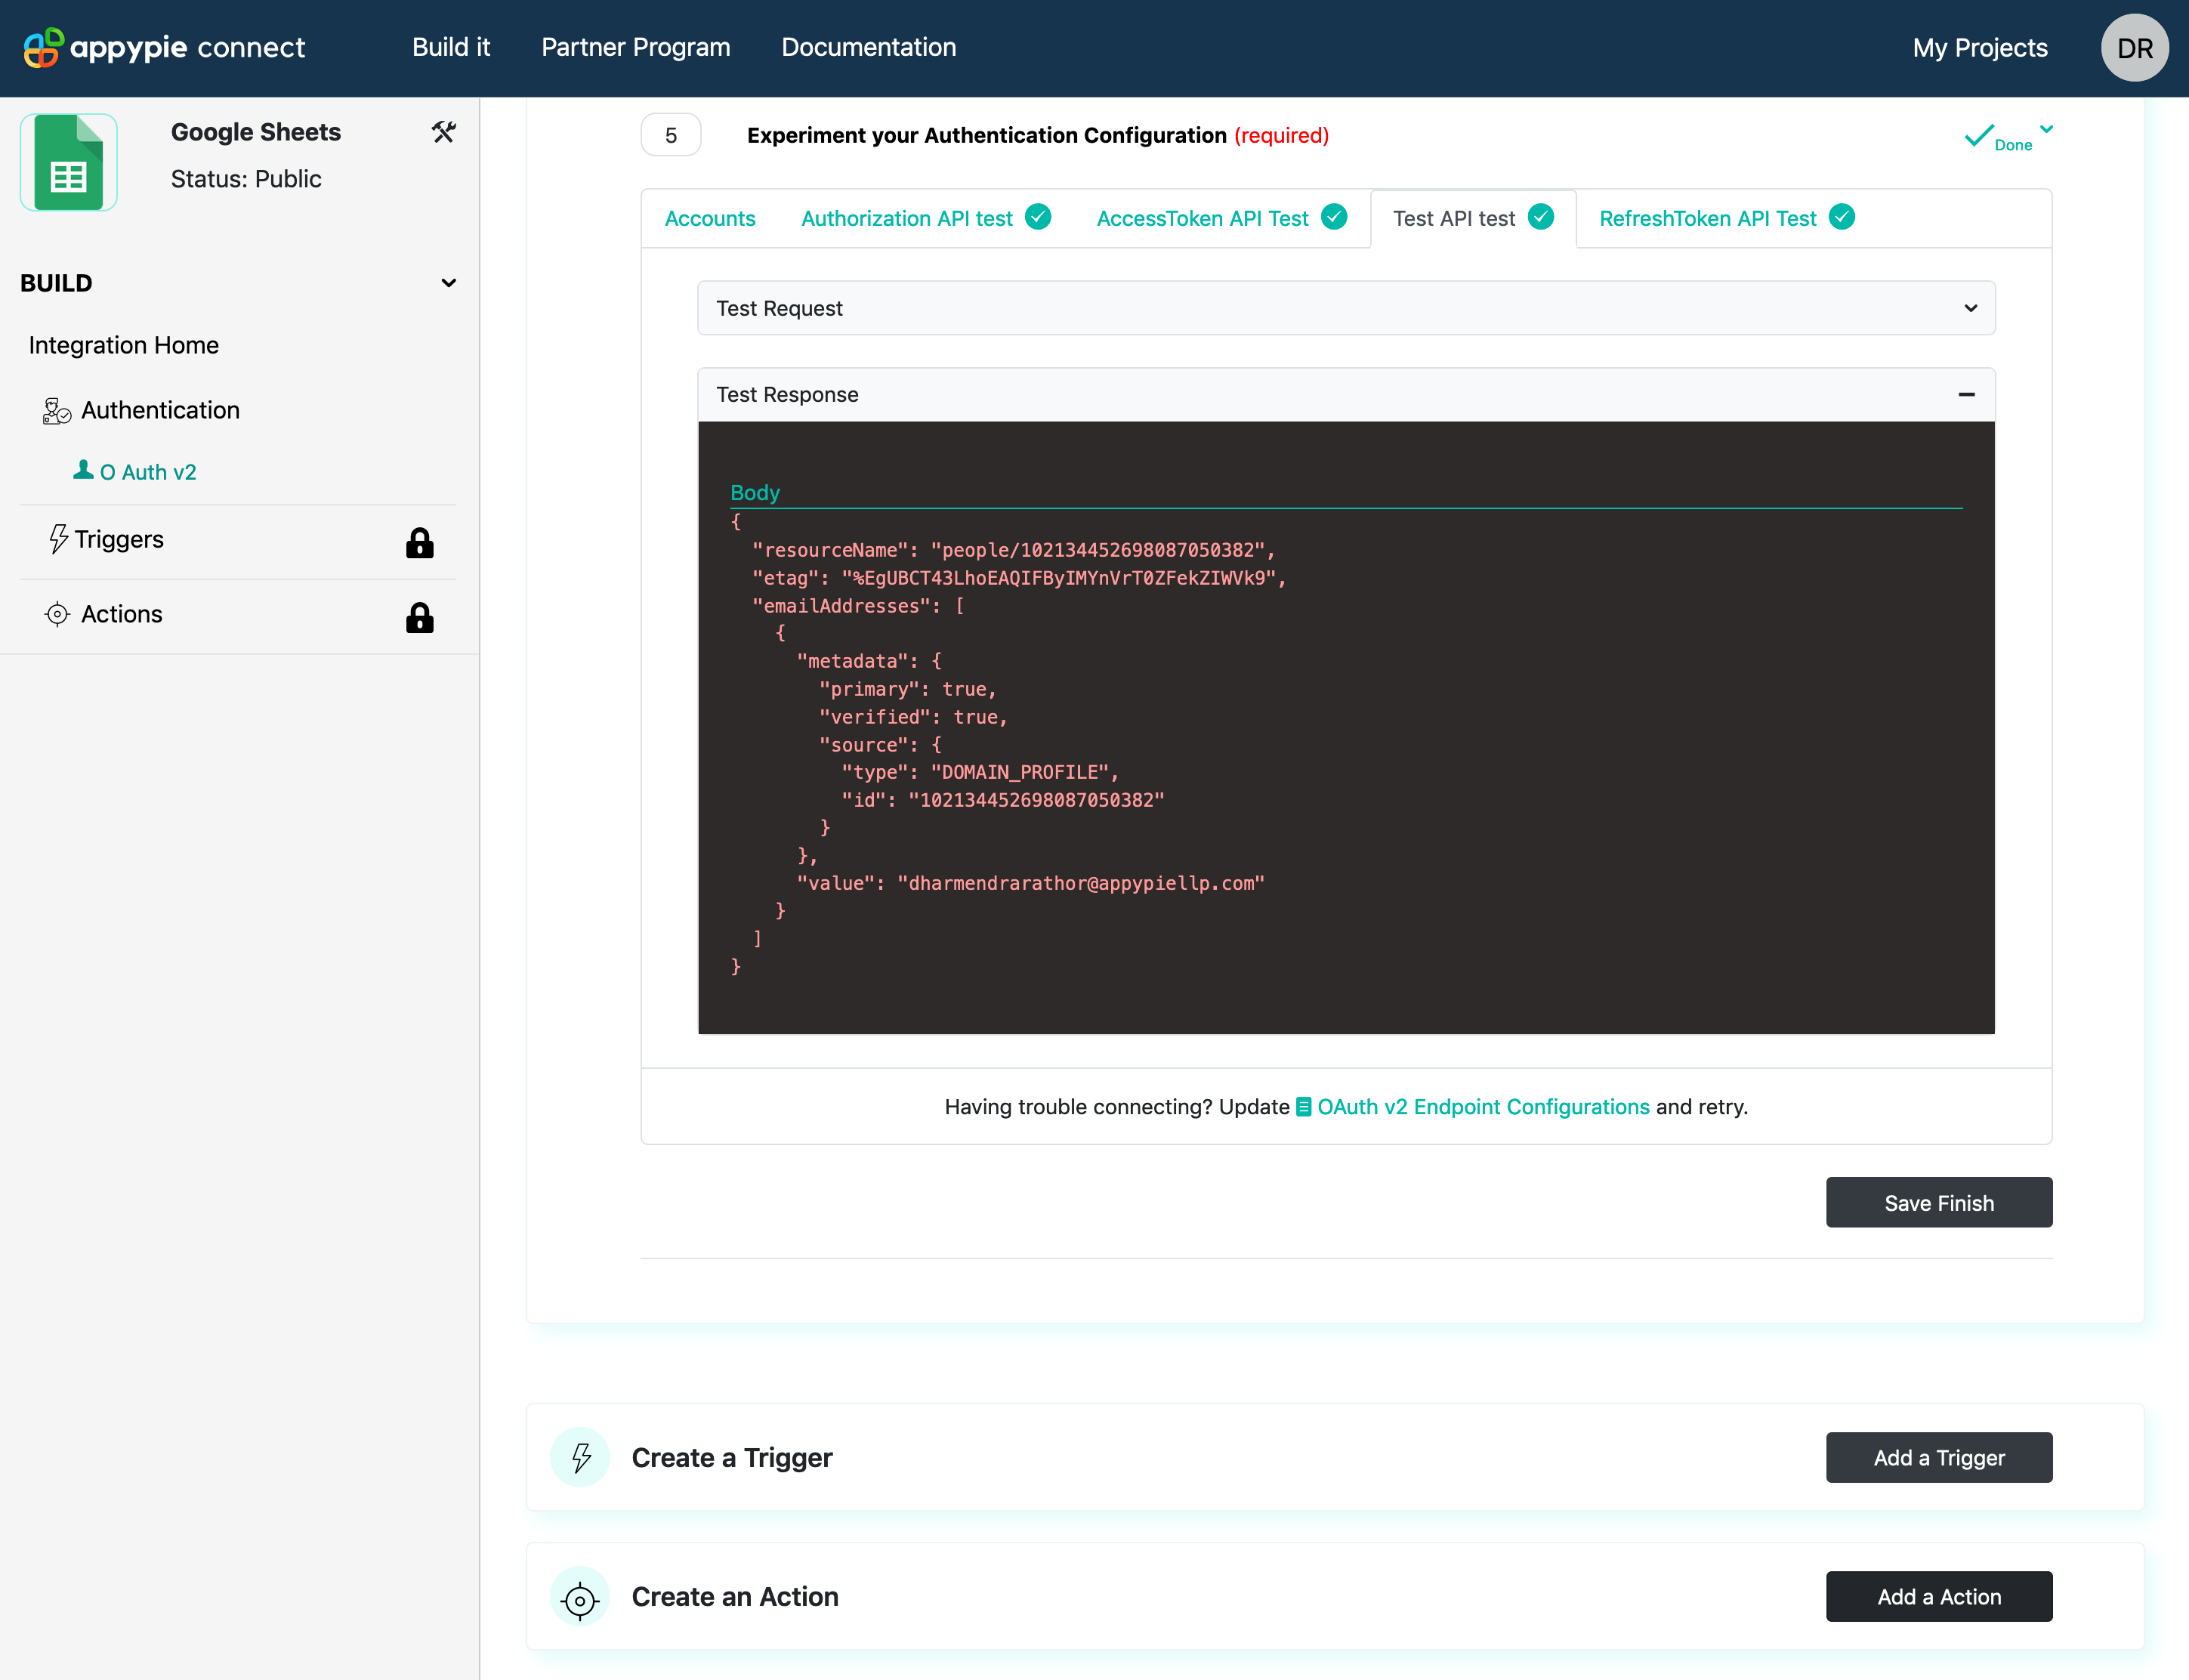
Endpoint testing is required for final implementation, check the API to ensure that the credentials are working smoothly.
When others use your integration, they see a similar login flow to connect to your app in Appy Pie Automate, a pop-up window will open from the Connect editor. To test, you can enter your Google Account credentials or Personal Access token. It will help to test triggers and actions while you form an integration.