Validation
Once you are done with the Triggers and Actions, to verify that all the requirements properly filled in order to sync with different apps available on Appy Pie Connect validation are required. This corroborates that all the given data is proper and fields, the list of data is in order to integrate with the different apps.
To check the validation you can follow the below-given instruction set:
Step 1: Integration Home

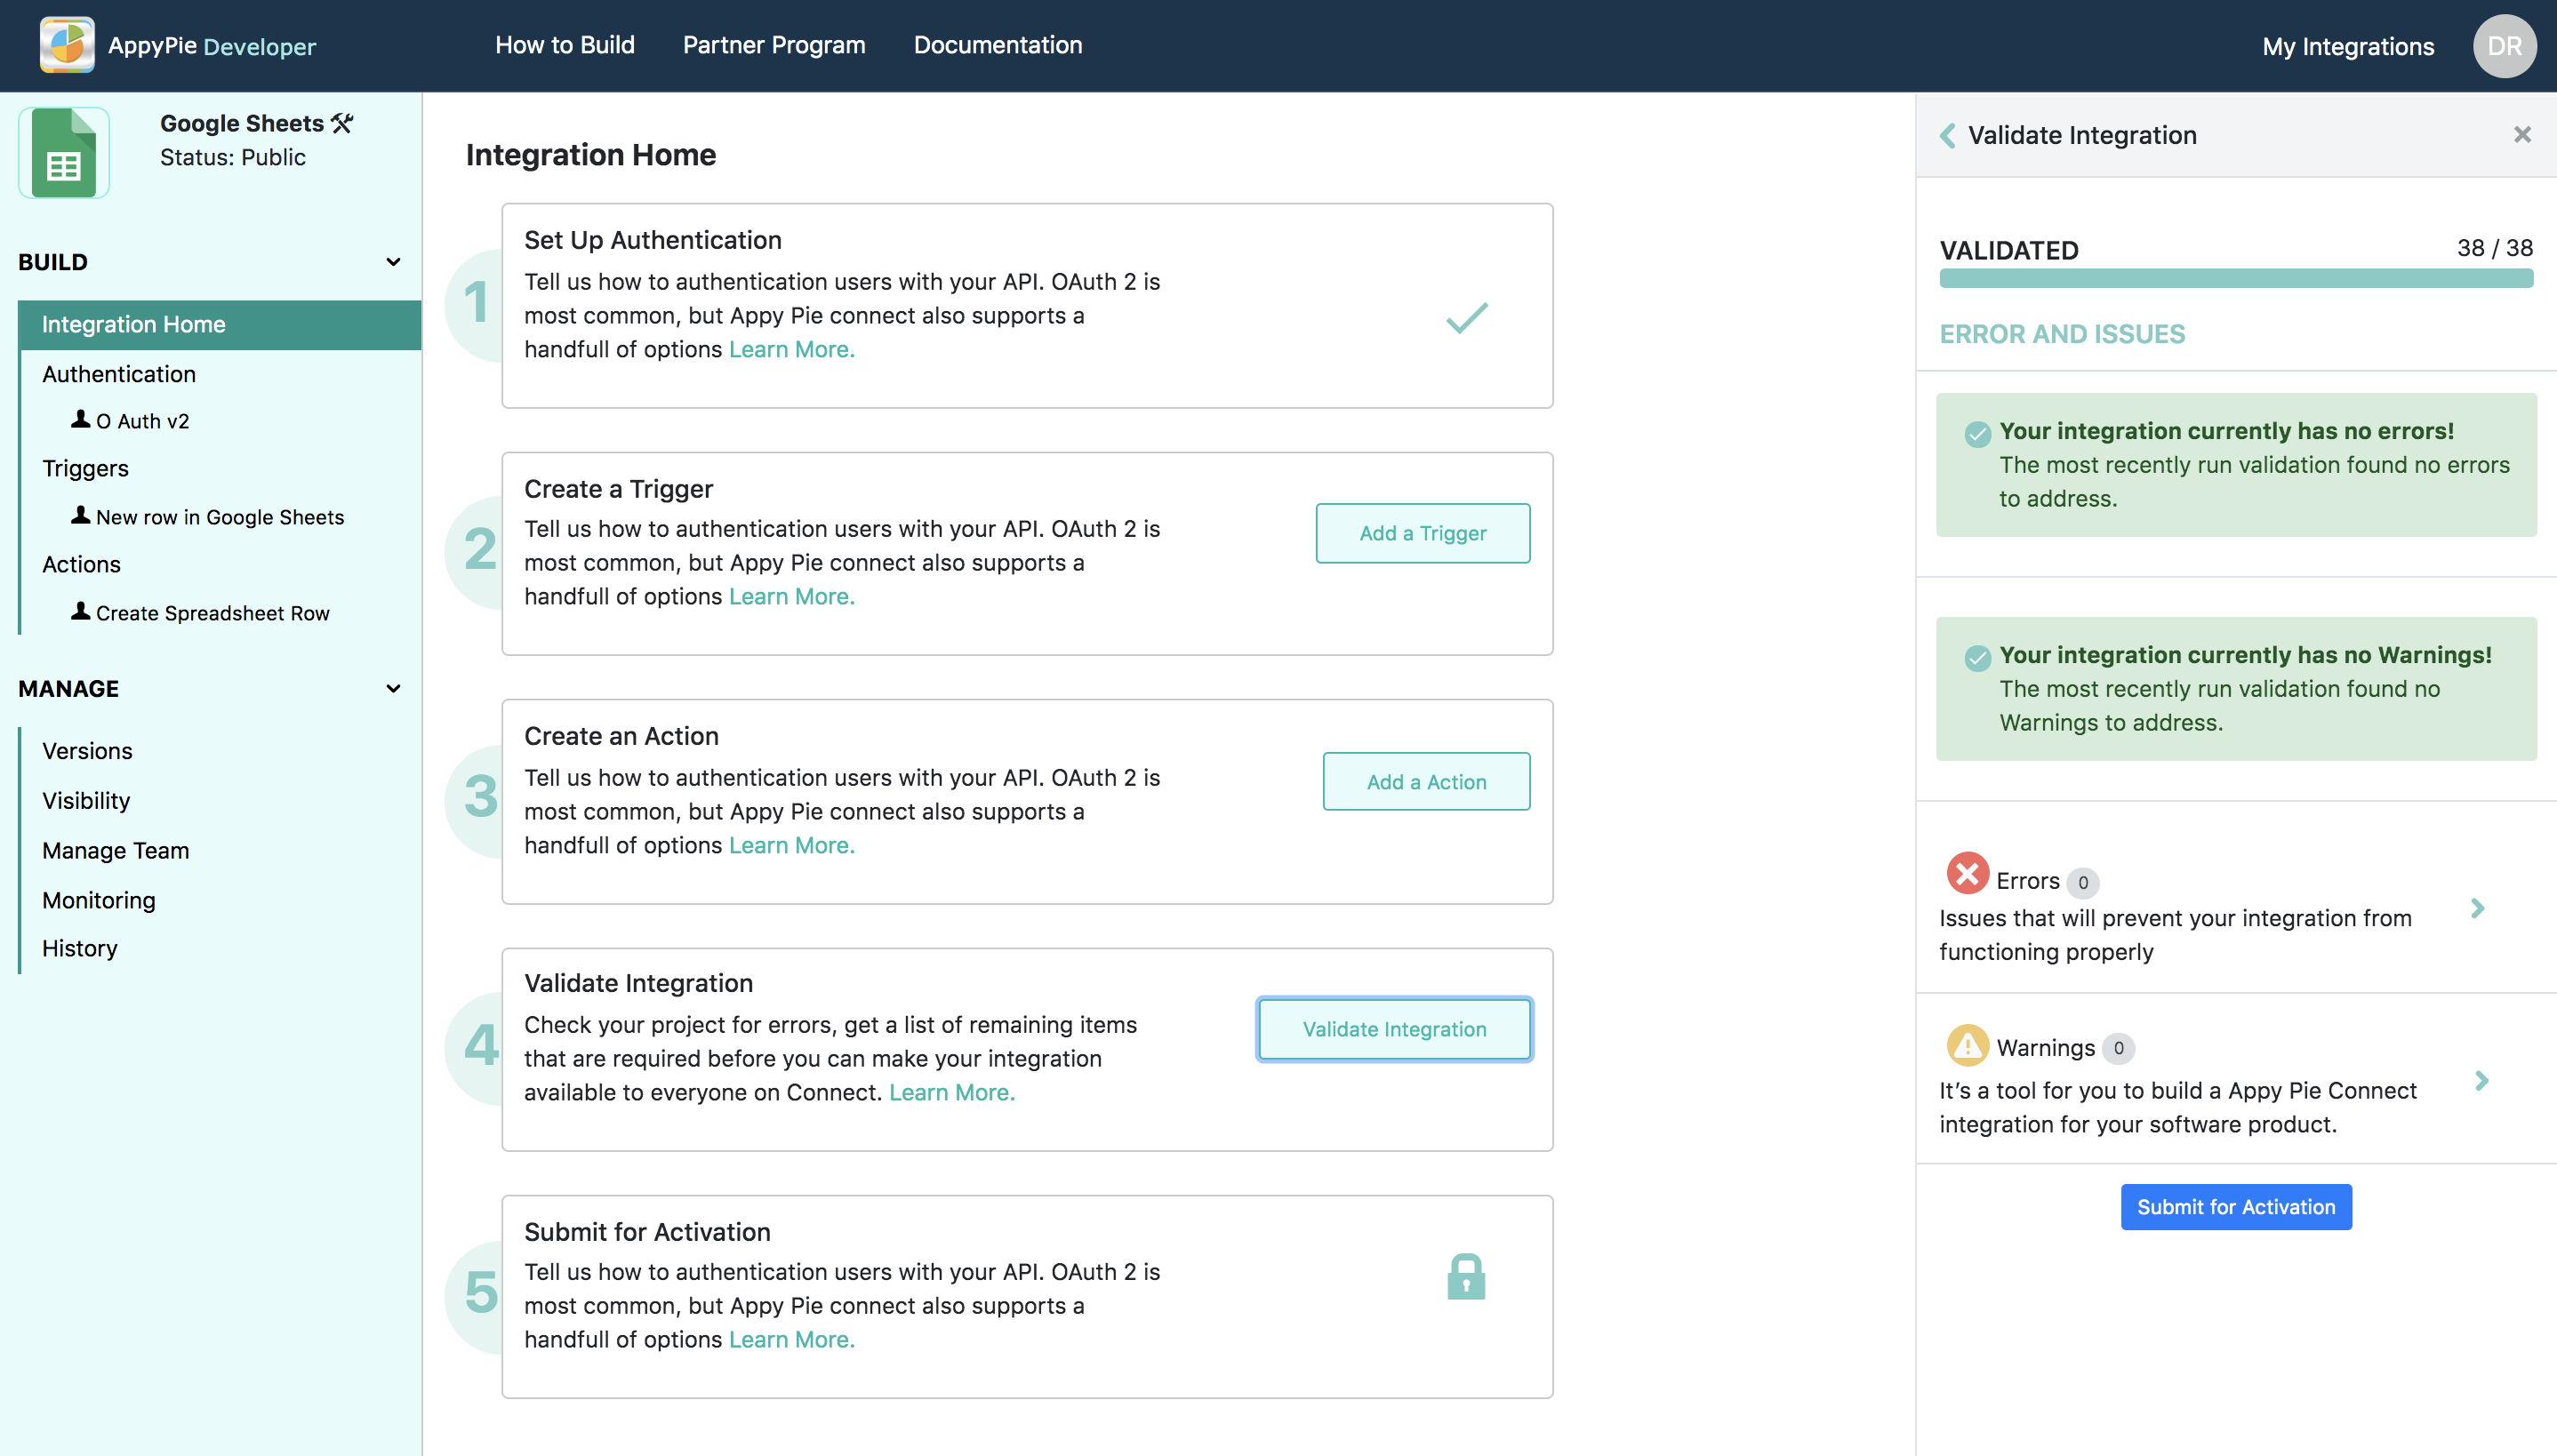
Go to “Integration Home” present in the navigational panel under “Build”. The validation option will be locked as this step is pending for your project.
Step 2: Run Validation

To check the validation under the “Integration Home” you will be able to select “Run Validation” option.
As soon as “Run Validation” option is selected a right-hand panel will show the “Validate Integration” panel. Here, all the steps will be automatically checked for any error or missing field. The counter will show the number of processes completed in “Validated” section.
If there are any errors, warnings or activation tasks then “To-Do” section will list all of such requirements.
- Errors - All the snags that need to be patched in order to integrate properly with other apps on Appy Pie Connect will be listed here. Once all the errors have resolved the integration with other apps will become feasible at Appy Pie Connect.
- Activation Tasks - Prerequisite data required before making a connect is confirmed in the “Activation Tasks”, information such as “Triggers” “Data” etc. These are basic information that must be available in order to get your app listed at Appy Pie Connect platform.
- Warnings - Warnings are the necessary recommendations that Appy Pie Connect platform caters before final activation. Check the data format and information provided before the project gets into the review stage.
After resolving all the errors and cross-checking the warnings, activation tasks you will get “Submit for Activation” tab unlocked.
